This tutorial will help you configure your Public Cloud Project (OpenStack Tenant) on CinderCloud hosting in the Horizon Dashboard.
Note: This procedure utilizes the Horizon Dashboard, if you prefer working with Command Line Interface (CLI), please refer to the manual: Access your OpenStack Project using Command-Line Interface
Log in to the Client Area
Log in to the Dashboard with your username and password. Optionally, you can sign in using Google or Facebook account.
Select your Project
Click on the Services tile and locate your Project:
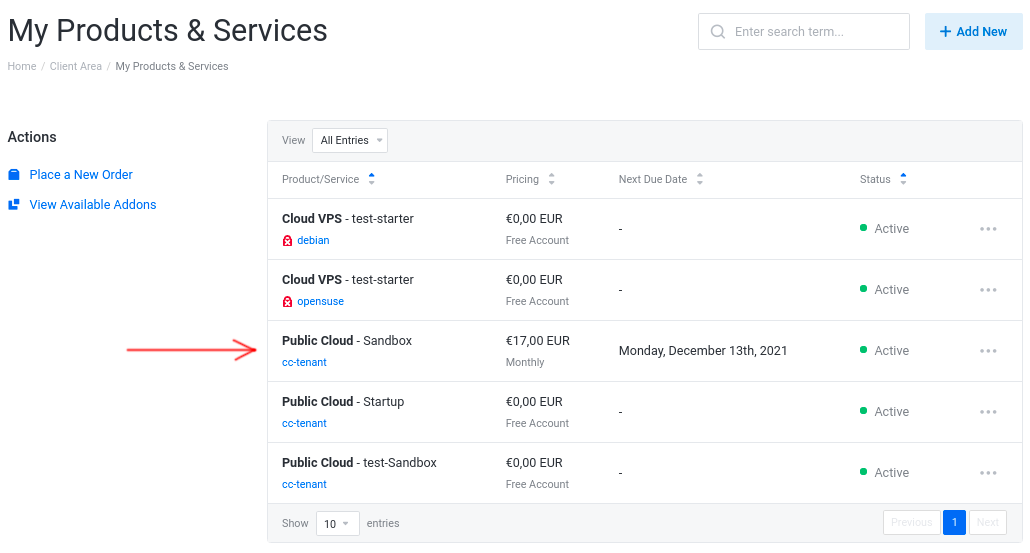
Click on the selected Project, next in the Product Details page, click on the Log In To Panel tile:
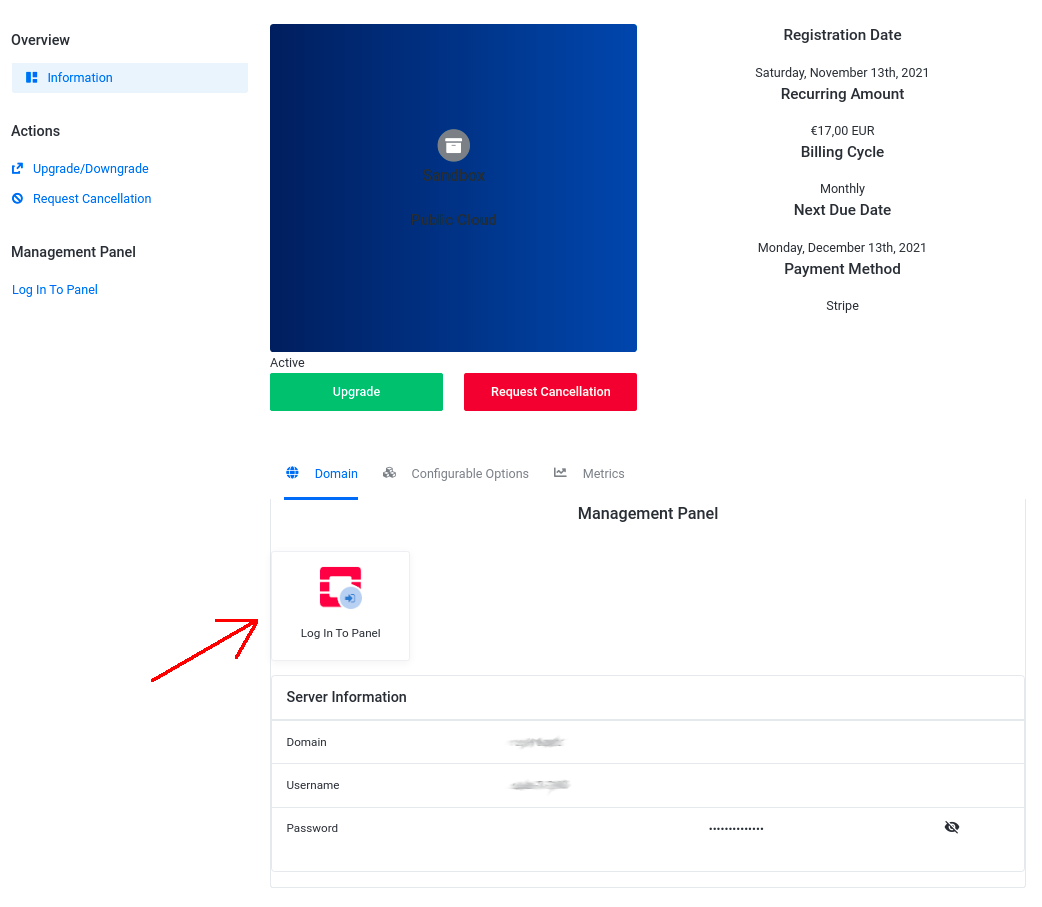
You will be redirected to the OpenStack Horizon dashboard.
Log in to the Horizon
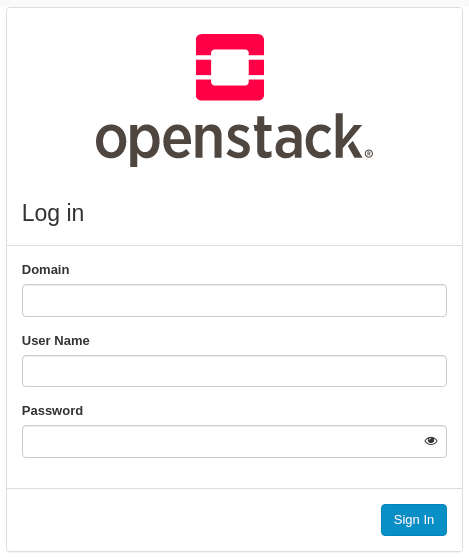
Log in to the Horizon dashboard using your credentials (from the Product Details page):
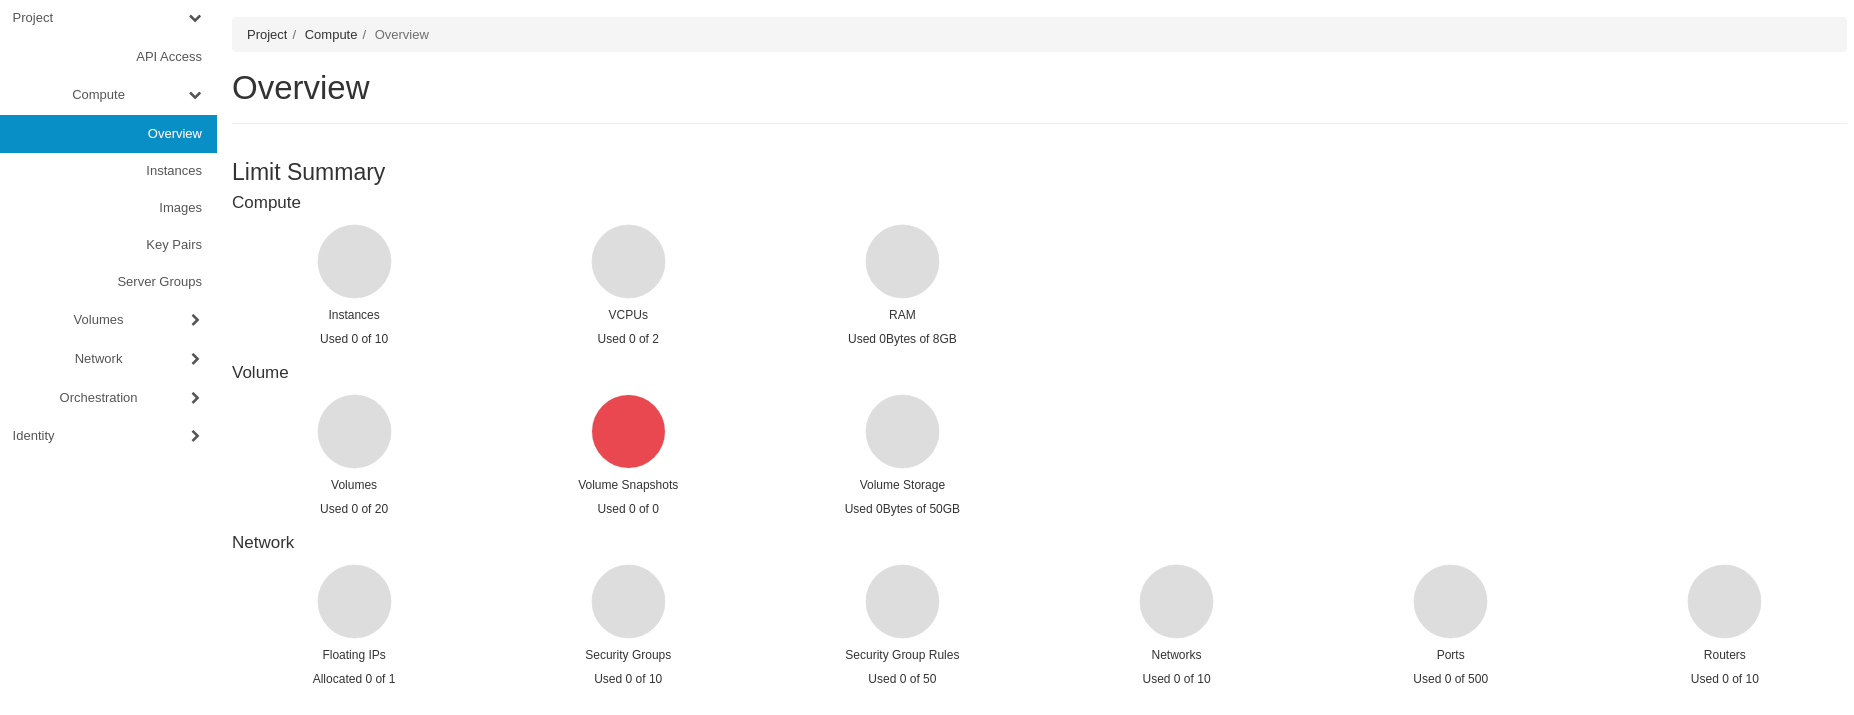
Right after logging in you should see the dashboard with the project overview:
Configure Network in your Project
Each OpenStack project in Public Cloud is assigned at least one public Floating IP in Floating-IP network.
You can check the Floating-IP network available for your project in the Project -> Network -> Network Topology tab:
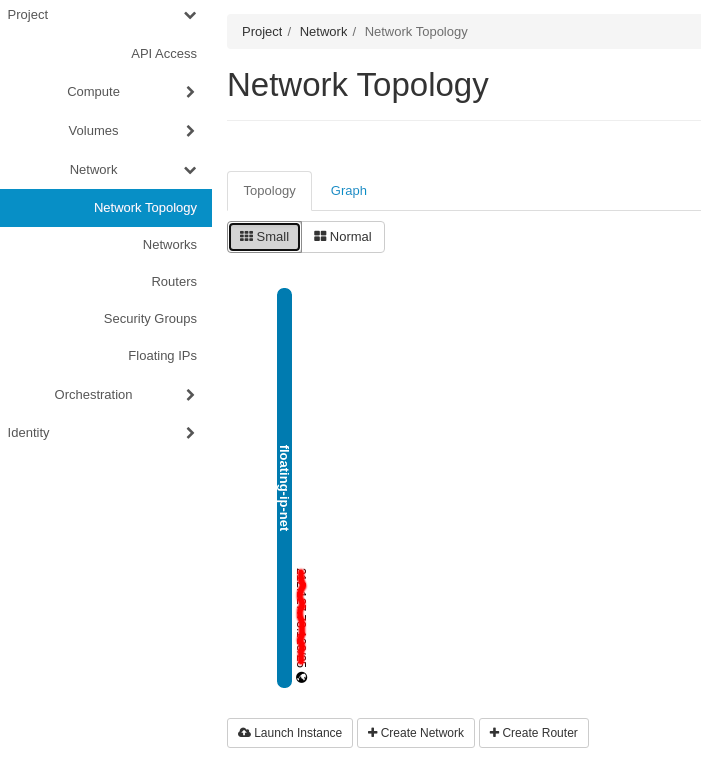
In order to obtain access to the external/public Floating-IP network, you need to create a router.
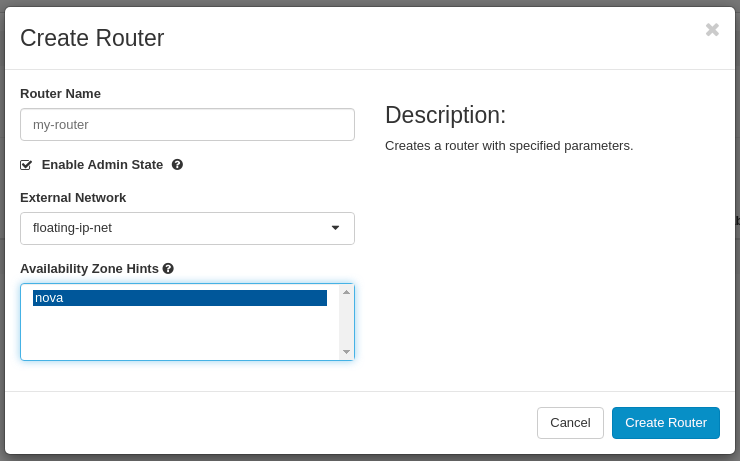
Go to the Project -> Network -> Routers tab and click on the Create Router button in the right-upper corner of the dashboard.
Type router details:
- Router Name: my-router
- Enable Admin State: Enabled
- External Network: select available Floating-IP network from the drop-down menu
- Availability Zone Hints: nova
Now create a private network for your future Instances (Virtual Machines) in order to let them communicate with each other within your Project.
Go to the Project -> Network -> Networks tab and click on the Create Network in the right-upper corner of the dashboard.
In the Network tab type the network details:
- Network Name: my-private-net
- Enable Admin State: Enabled
- Create Subnet: Enabled
- Availability Zone Hints: nova
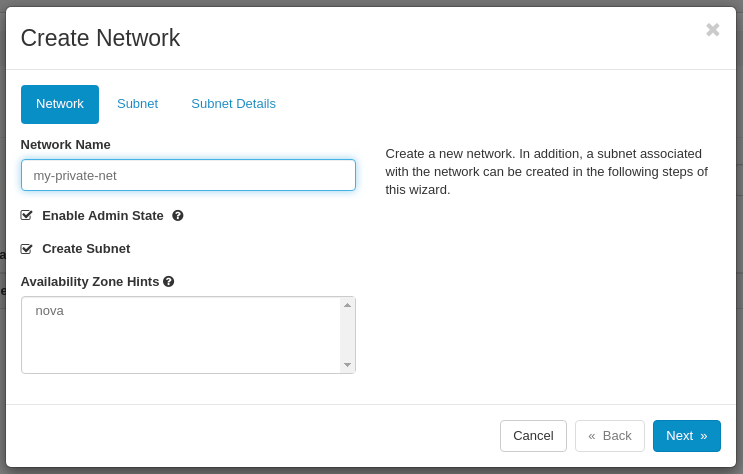
Click on the Next button.
In the Subnet tab type the subnet details:
- Subnet Name: my-private-subnet
- Network Address: 192.168.1.0/24 (example)
- IP Version: IPv4
- Gateway IP: 192.168.1.1 (this parameter is mandatory if you want your private network to have the access to the internet via a router)
- Disable Gateway: Disabled
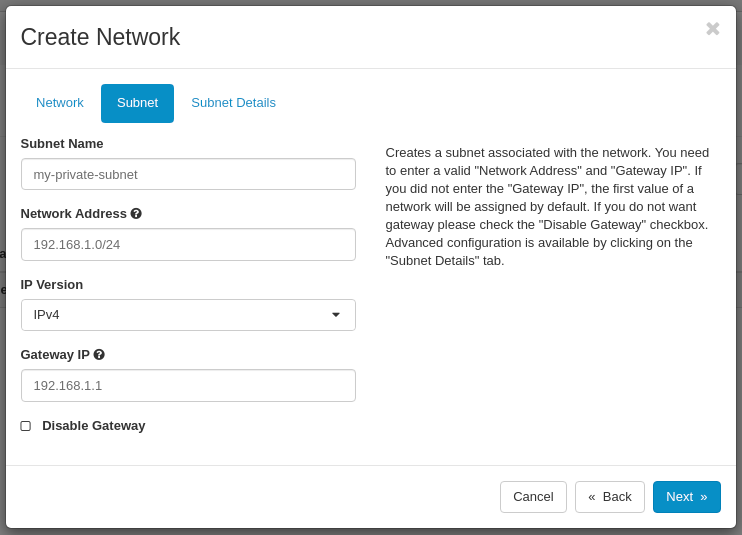
Click on the Next button.
In the Subnet Details tab set:
- Enable DHCP: Enabled
- Allocation Pools: optional
- DNS Nameservers: optional
- Host Routes: optional
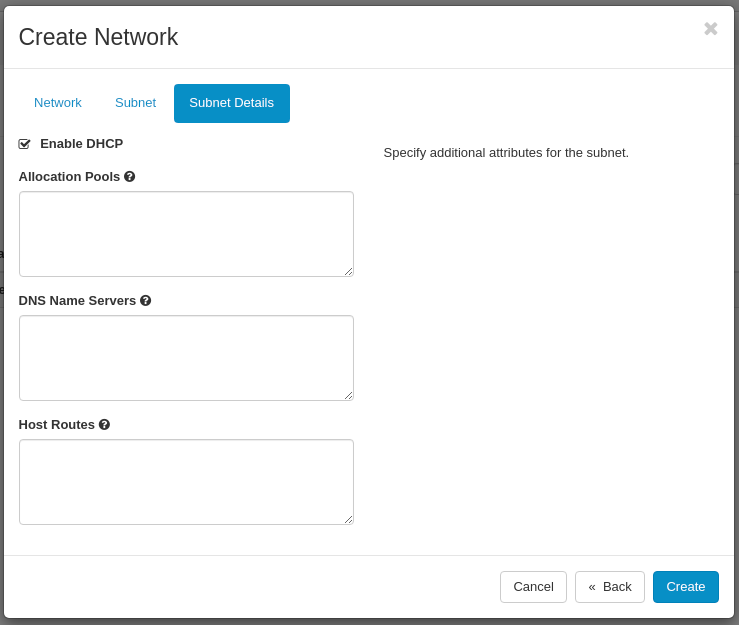
Click on the Create button.
You have created your private network based on the IPv4 subnet, now it's time to attach your private network to the router.
Go back to the Project -> Network -> Routers tab and click on your router:

Now click on the Interfaces tab, next click on the Add Interface button:

In the Add Interface window set:
- Subnet: my-private-net (192.168.1.0/24)
- IP Address: 192.168.1.1 (this is a gateway IP address in our private network)
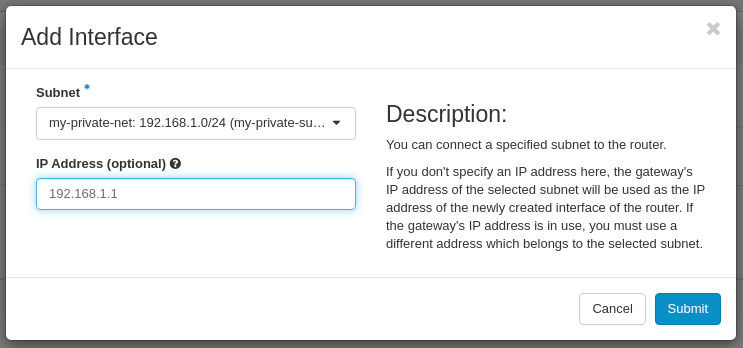
Click on the Submit button.
Now go to the Project -> Network -> Network Topology tab and verify your network configuration.
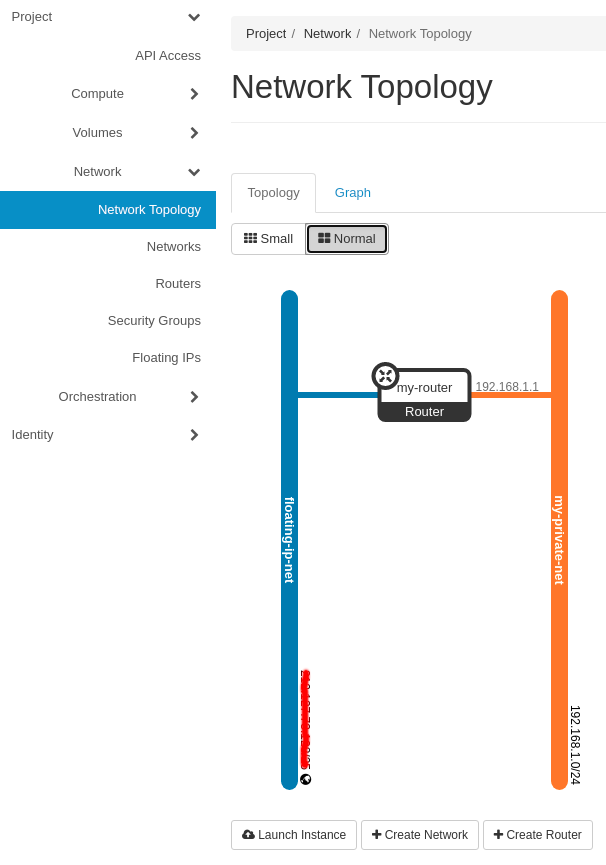
Your private network should now be connected to the external/public Floating IP network via your router.
Allocate Floating IP to your Project
You will need external Floating IP to get to your Project private networks from the internet.
In order to allocate a Floating IP to your Project proceed to the Project -> Network -> Floating IP tab and click on the Allocate IP To Project button:

In the Allocate Floating IP window set:
- Pool: floating-ip-net (available Floating IP network name may vary across different Projects)
- Description: optional (for your reference)
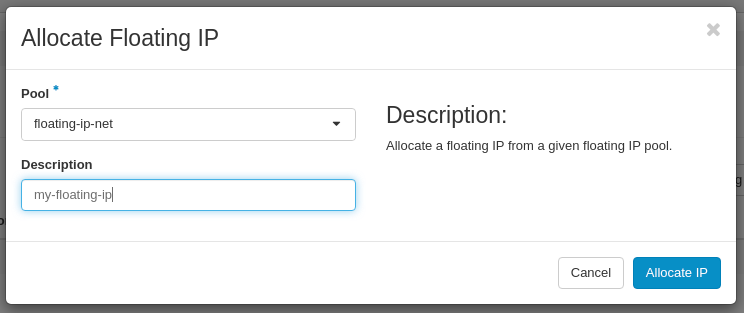
Next click on the Allocate IP button.
Note: available Floating IP quota in your pool depends on the IP amount you have chosen upon your purchase order. Currently, our Public Cloud hosting plans support up to four IPv4 addresses.
Create a Security Group
All projects in OpenStack have a default security group which is applied to any instance that has no other defined security group. Unless you change the default, this security group denies all incoming traffic and allows only outgoing traffic to your instance. In this tutorial, we create our own security group (recommended approach) and assign appropriate rules to the group.
In order to allow our future Instances to communicate with the internet, we will allow ICMP Echo (ping) and SSH traffic in both directions, that is inbound and outbound traffic.
Go to the Project -> Network -> Security Groups tab and click on the Create Security Group button:

In the Create Security Group window set:
- Name: my-sec-grp (example)
- Description: optional (for your reference)
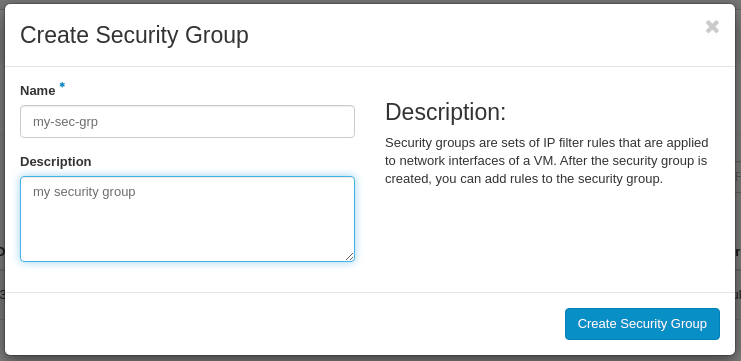
Click on the Create Security Group button.
Now let's assign additional rules to our Security Group, to allow Ping and SSH traffic.
Go back to the Project -> Network -> Security Groups tab, choose your newly created Security Group on the list, and click on the Manage Rules button:

In the Manage Security Group Rules section, click on the Add Rule button:

First, create a rule to allow inbound ICMP traffic:
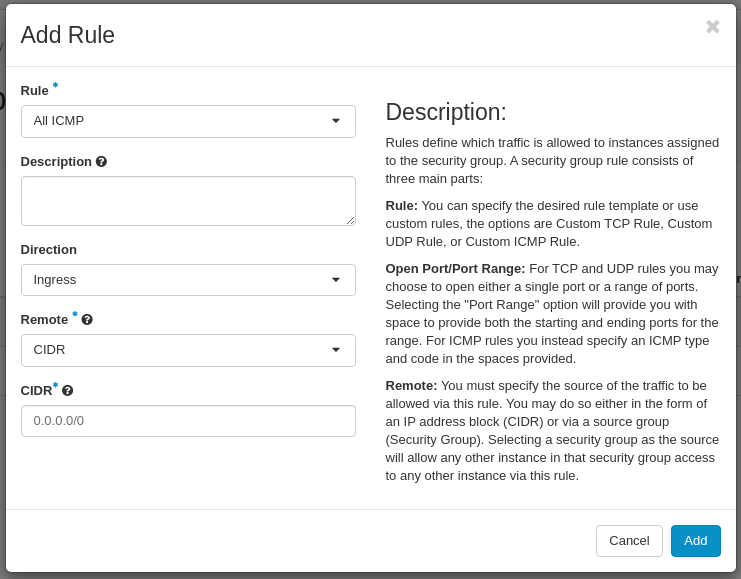
Click on the Add button.
Next, create a rule to allow outbound ICMP traffic:
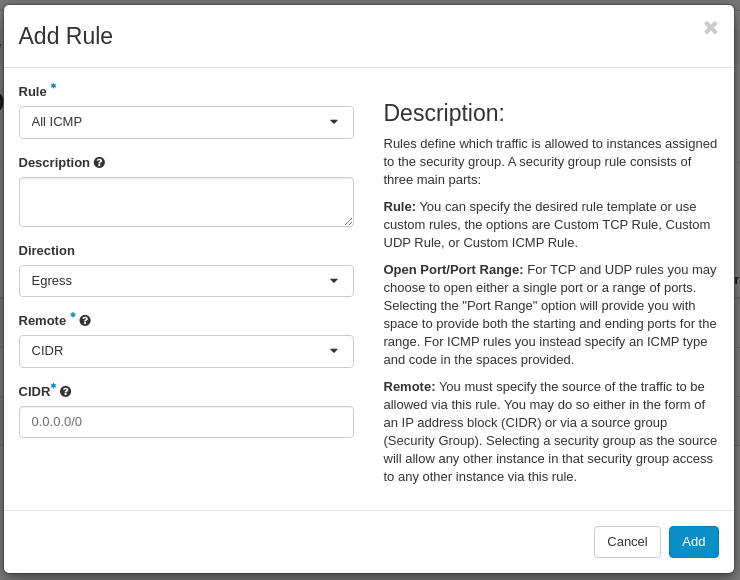
Click on the Add button.
Now, create a rule to allow SSH inbound traffic:
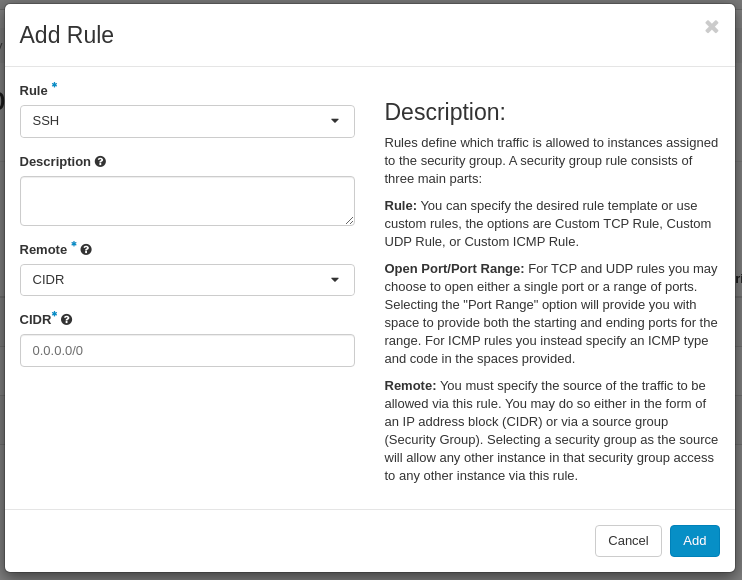
Click on the Add button.
Finally, create a rule to allow SSH outbound traffic:
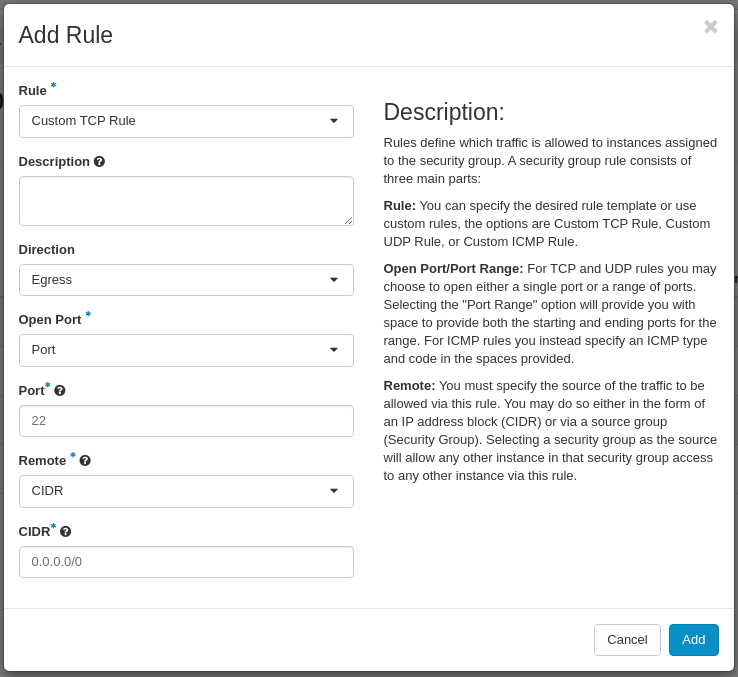
Click on the Add button.
The whole set of our rules should now look like the below:

Upload Image to your Project
Before you create your first Instance, you need a working OpenStack QCOW2 / RAW image with cloud-init.
In order to upload the image proceed to the Project -> Compute -> Images tab and click on the Create Image button:

In the Create Image window, in the Image Details tab set mandatory parameters:
- Image Name: pick a name for your image
- File: browse your PC for the OpenStack image (we use Cirros image here)
- Format: QCOW2 (QEMU Emulator)
- Visibility: Private (this option restricts the image to your Project only)
- Protected: yes | no (this option protects your image from accidental removal)
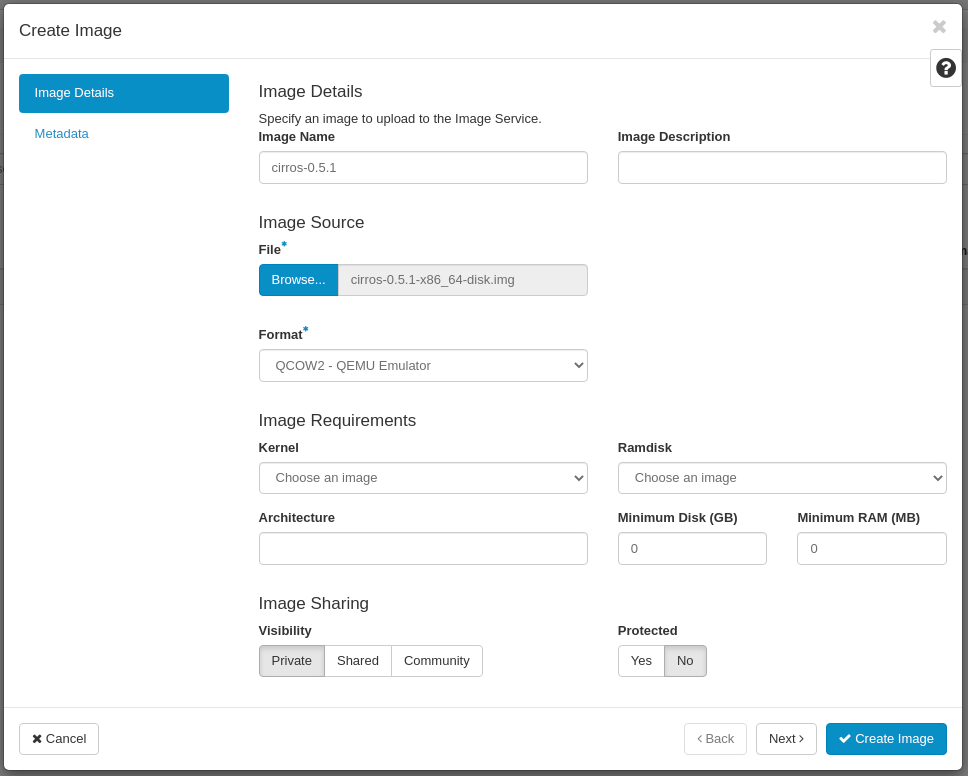
Next click on the Create Image button.
Your new image should now appear on the list:

Launch an Instance (Virtual Machine)
Finally, we can launch our first Instance, connect it to our private network and assign Floating IP to let us access our Instance from the internet.
Proceed to the Project -> Compute -> Instances tab and click on the Launch Instance button:

Note: some of the Instance details are optional, so for the sake of simplicity, in this tutorial we will create our Instance with the mandatory parameters only.
In the Launch Instance window, in the Details tab set Instance basic information:
- Instance Name: type name for your new instance
- Description: optional
- Availability Zone: nova
- Count: 1 (for demonstration purposes we create here only one Instance)
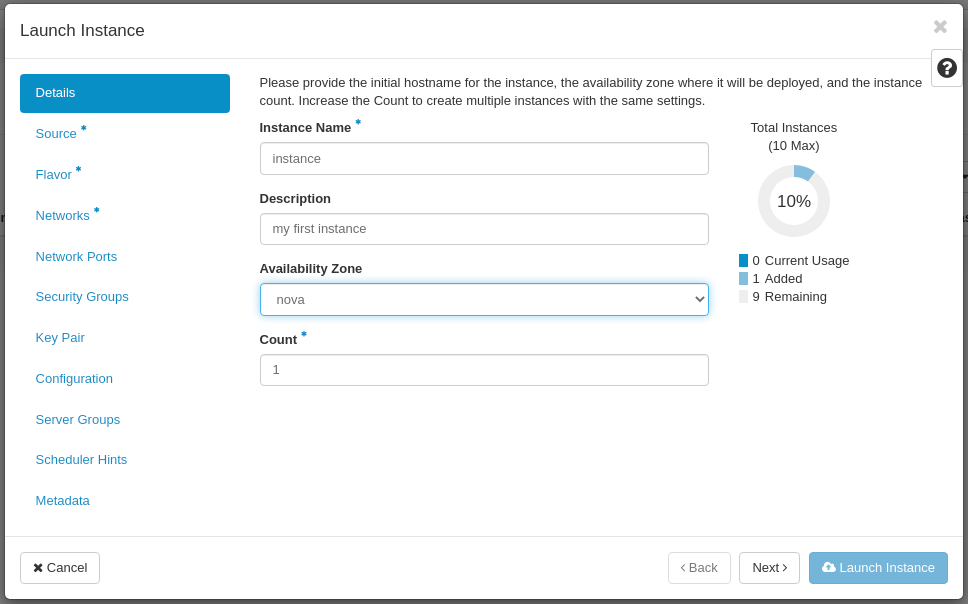
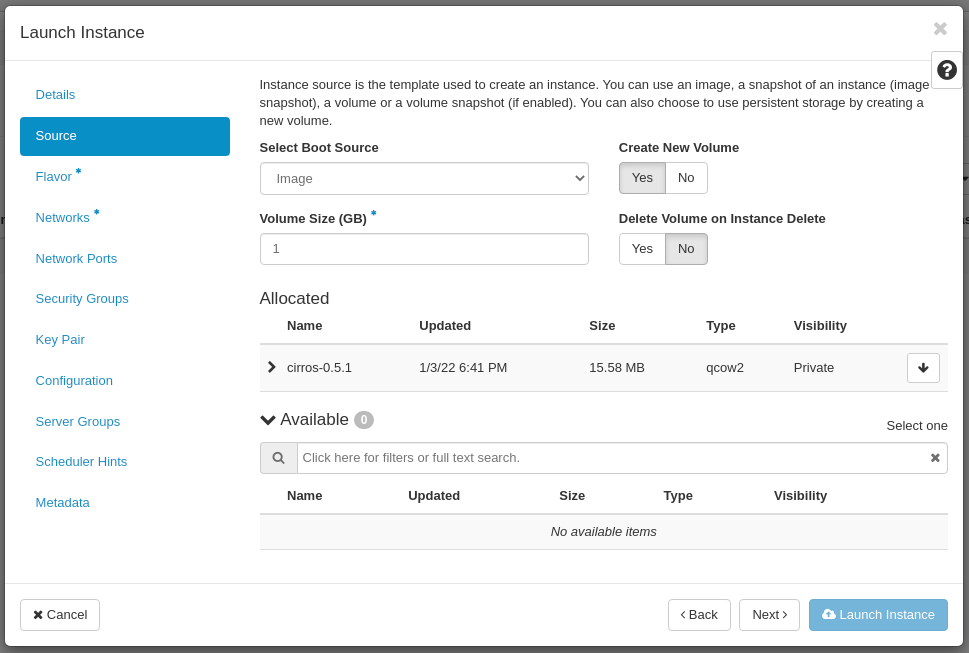
In the Source tab set:
- Select Boot Source: Image
- Create New Volume: Yes (do not change it unless you know what you are doing, if you choose No here, your Instance will be ephemeral, that is, it will not have access to the persistent storage)
- Volume Size (GB): set your preferred capacity (the capacity of your volume must be equal or bigger than the flavor you are going to use in the next step)
- Delete Volume on Instance Delete: No (if you set Yes here, your volume will be deleted along with the Instance upon its deletion)
- Allocated: cirros-0.5.1 (allocate here your previously uploaded image)
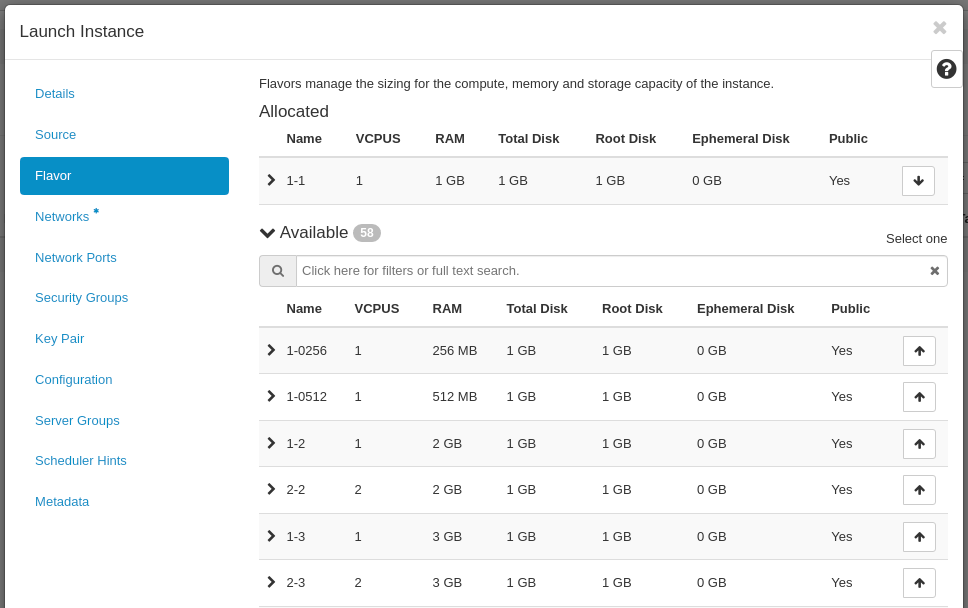
In the Flavor tab pick your preferred flavor from the list:
- Allocated: 1-1 (1vCPU, 1GB RAM, 1GB HDD - disk capacity for this flavor must not exceed the volume size you have chosen in the previous step)
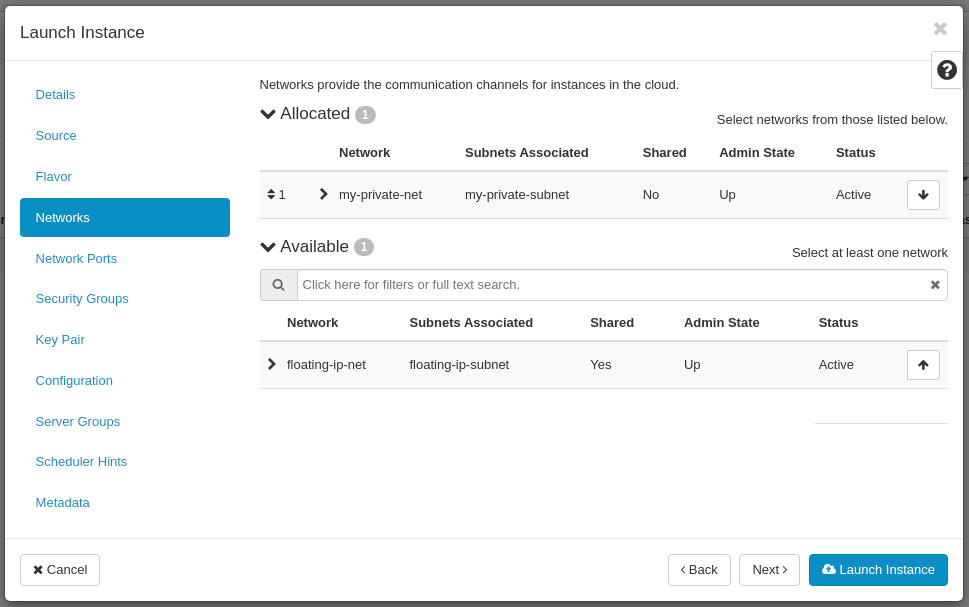
In the Networks tab pick your private network from the list:
- Allocated: my-private-net (avoid connecting your Instance directly to the Floating IP (external) network here, unless you don't want it to be exposed to the internet, you will connect your Instance to the external network via your router in the next step)
In the Security Groups tab pick your security group from the list:
- Allocated: my-sec-grp
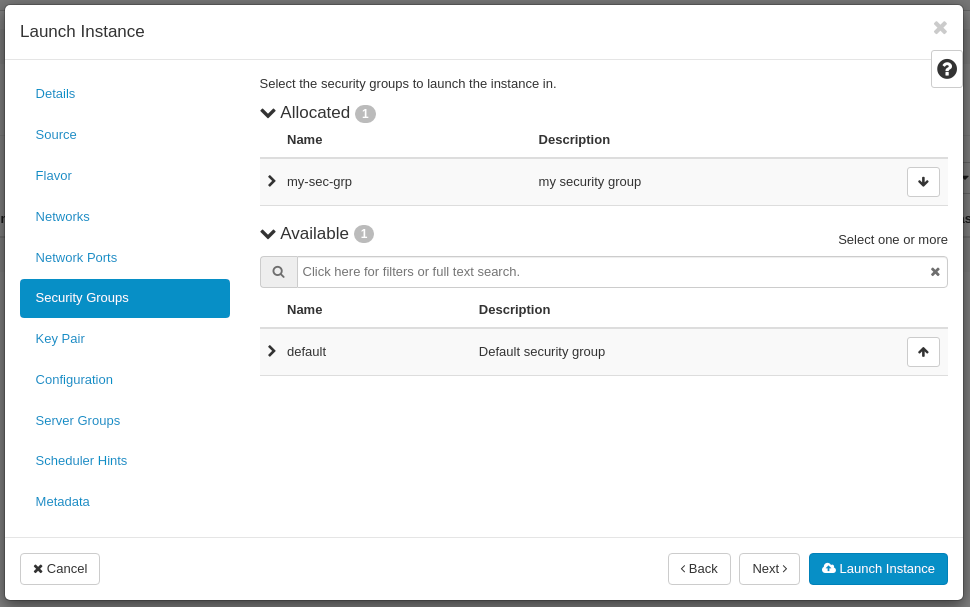
You have accomplished the mandatory (basic) configuration required to launch your new Instance.
Now click on the Launch Instance button to start your Instance.
Note: creating an Instance may take a while, depending on the size of the image you have chosen to create your Instance on.
Your newly created Instance should appear on the Instance list:

Your Instance is not accessible from the internet yet, you need to associate a Floating IP with your Instance in order to make it accessible from the public network.
Associate Floating IP
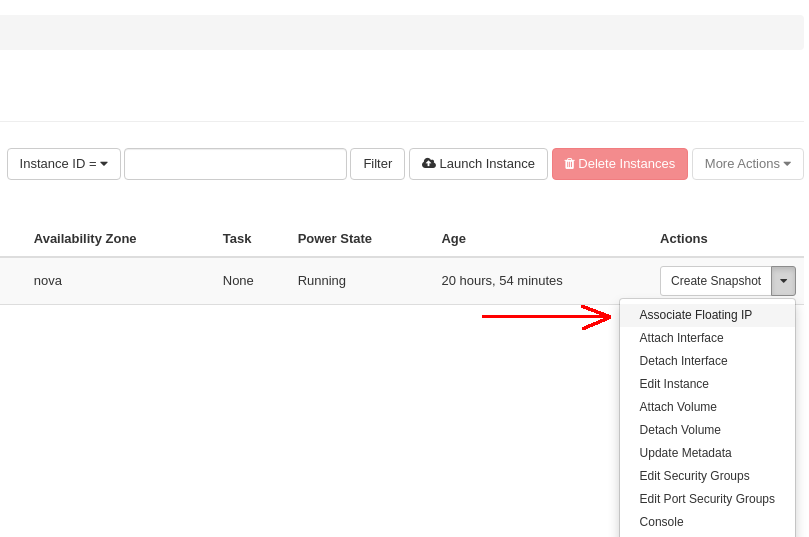
In order to associate a Floating IP with an existing Instance, go back to the Project -> Compute -> Instances tab, locate your Instance from the list, and choose the Associate Floating IP option from the Actions drop-down menu:
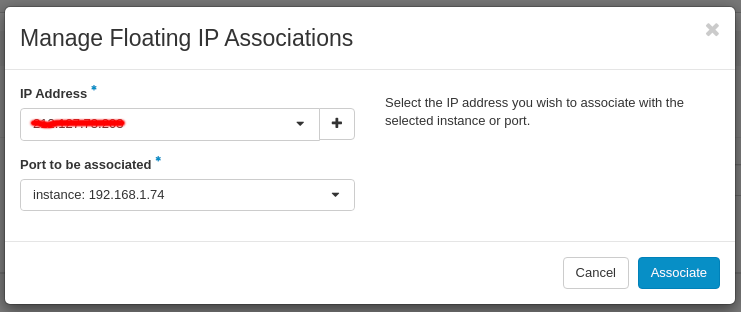
In the Manage Floating IP Associations window assign:
- IP Address: choose an available Floating IP address from the drop-down menu
- Port to be associated: choose an internal IP of your Instance
Your Instance has now Floating IP assigned:

Connect to your Instance
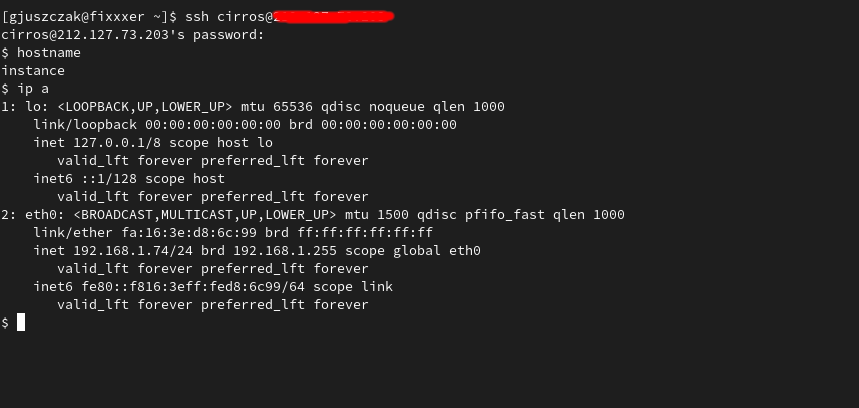
Now you can test SSH connectivity to your Instance from the internet using the assigned Floating IP address:
