

This manual describes the procedure of creating a Volume in your OpenStack Project and attaching it to the existing Instance (Virtual Machine). We are going to create here an empty drive that will be attached to the running OpenStack Instance as additional storage.
Log in to the Client Area
Log in to the Dashboard with your username and password. Optionally, you can sign in using Google or Facebook account.
Select your Project
Click on the Services tile and locate your Project:
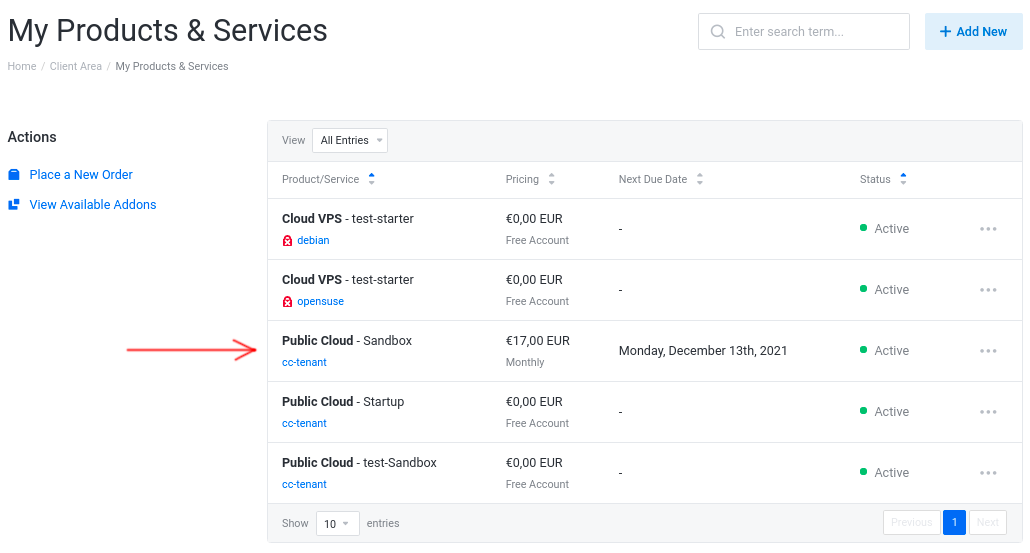
Click on the selected Project, next in the Product Details page, click on the Log In To Panel tile:
![]()
You will be redirected to the OpenStack Horizon dashboard.
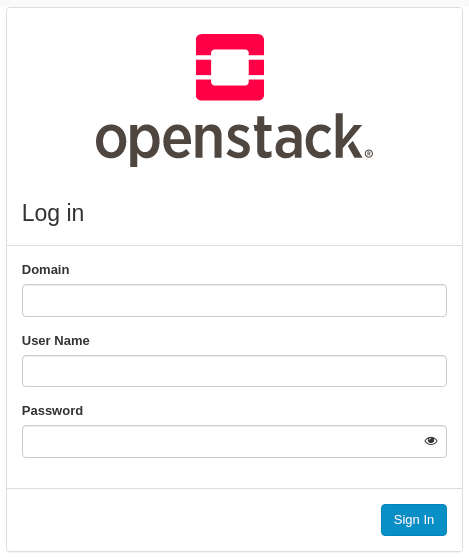
Log in to the Horizon
Log in to the Horizon dashboard using your credentials (from the Product Details page):
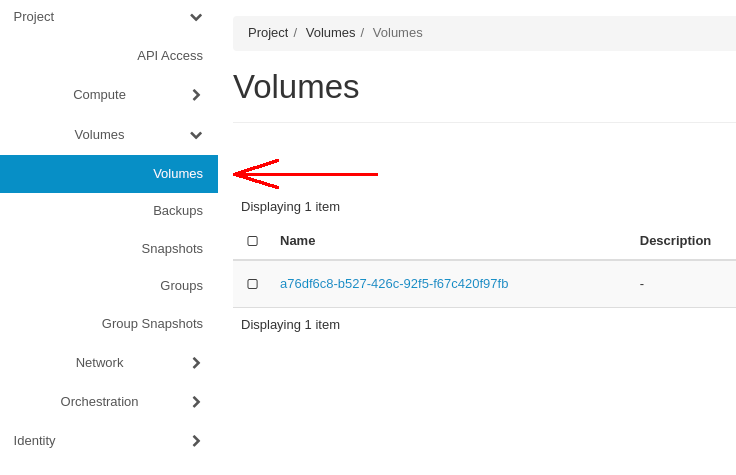
Create a Volume
After logging in go to the Project -> Volumes section:
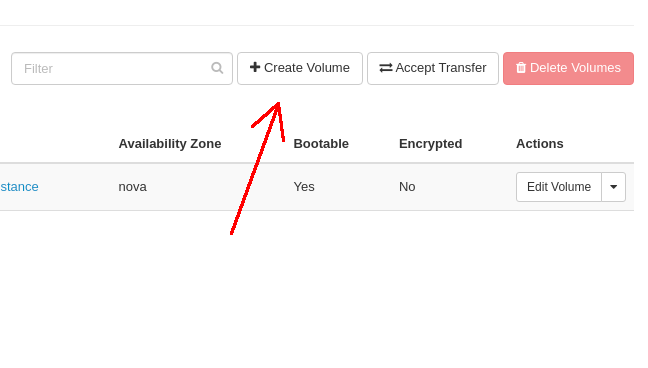
Click on the Create Volume button:
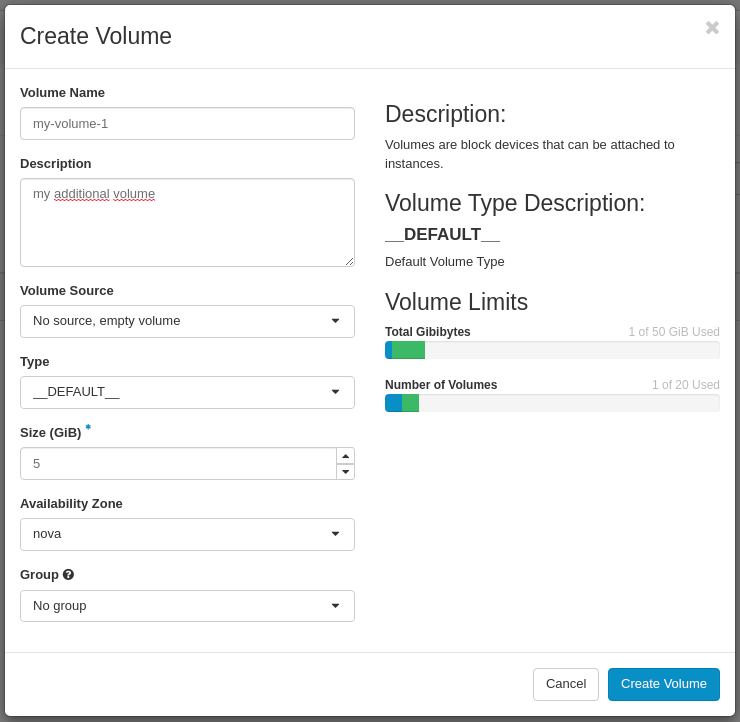
You will be presented with the new window with the parameters to fill:
- Volume Name
- Description - set the Volume description for your reference
- Volume Source - select no source, empty volume (we are creating an empty Volume, to be attached as additional storage to the existing Instance)
- Size - select the preferred size (in GiB)
Leave the remaining parameters with their default values.
Verify, if the Volume has been successfully created:
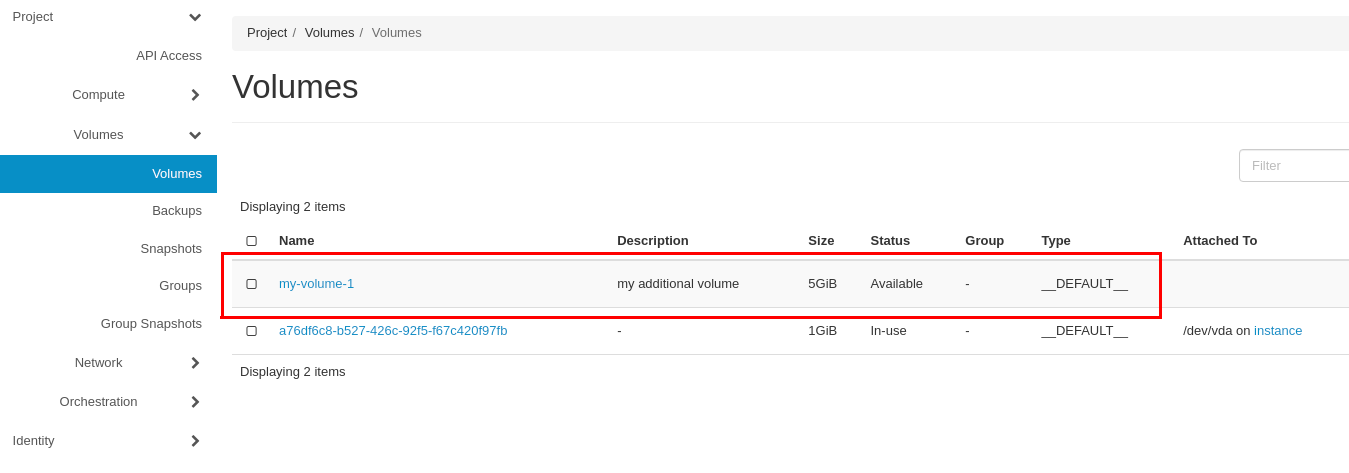
The newly created Volume is now in the Available state, which means it hasn't been attached to any OpenStack Instance yet.
Attach a Volume to an Instance
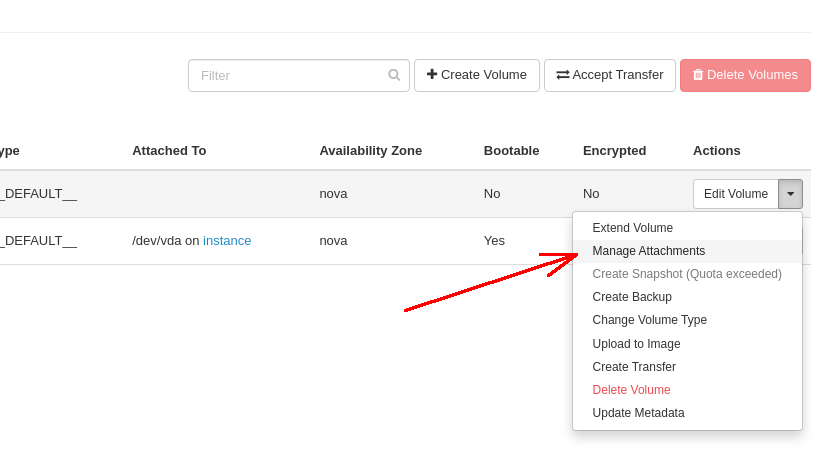
Additional (non-root) Volume can be attached to the Instance at any time, in the online or offline mode, however, it is recommended to attach the Volume while the Instance is off to avoid problems with detecting the new device.
Select your Volume, click on the dropdown menu, then select the Manage Attachments option from the menu:
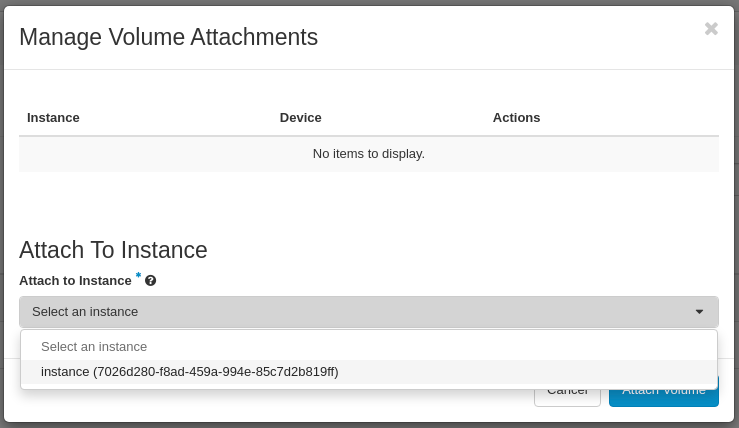
A new window will appear, where you can select an Instance you want the new Volume to attach to:
Once the Volume has been attached, its status should change now to In-use:
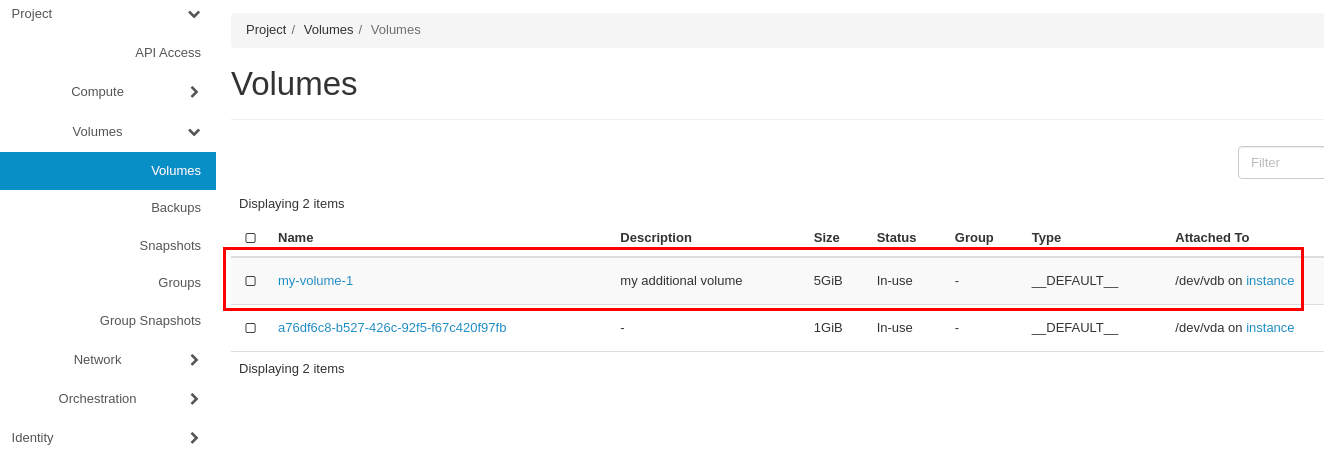
The Volume has been attached to an existing Instance as /dev/vdb device.
Now login to the Instance to ensure if the device has been detected by the system correctly:
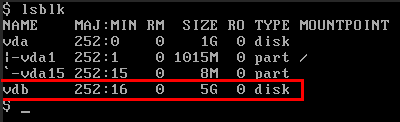
The new Volume is ready to use by the system, you can now mount it in the filesystem at the mount point of your choice.
