


Jenkins is a popular open-source automation server commonly used for Continuous Integration process. It's rich ecosystem of plugins, extensibility, flexibility, and community support make it a common choice when looking for an automation tool.
The application is Java-based and works on multiple Linux and Windows platforms and can be used to automate e.g. e-mail sending, scraping web content, or building and testing web and embedded software, which makes Jenkins an extremely versatile and powerful weapon in the development toolkit.
This tutorial will show how to configure the Rocky Linux 8 server and install the Jenkins web application.
Step 1: Install prerequisites
At first, we will update the system packages.
sudo dnf update -yNext, we need to install Java Development Kit (JDK). Both JDK in versions 8 and 11 will work for our purposes. JDK can be installed using the DNF command below.
sudo dnf install -y java-1.8.0-openjdkStep 2: Add Jenkins repository
To install the Jenkins package, we need to add an official repository to our system.
sudo dnf install -y wget
sudo wget -O /etc/yum.repos.d/jenkins.repo https://pkg.jenkins.io/redhat-stable/jenkins.repo
sudo rpm --import https://pkg.jenkins.io/redhat-stable/jenkins.io.key
sudo dnf update -y
Step 3: Install and start Jenkins application
At this step, we finally install the package with Jenkins controller (master) with its web application.
sudo dnf install -y jenkinsThen we start systemd service.
sudo systemctl enable jenkins
sudo systemctl start jenkins
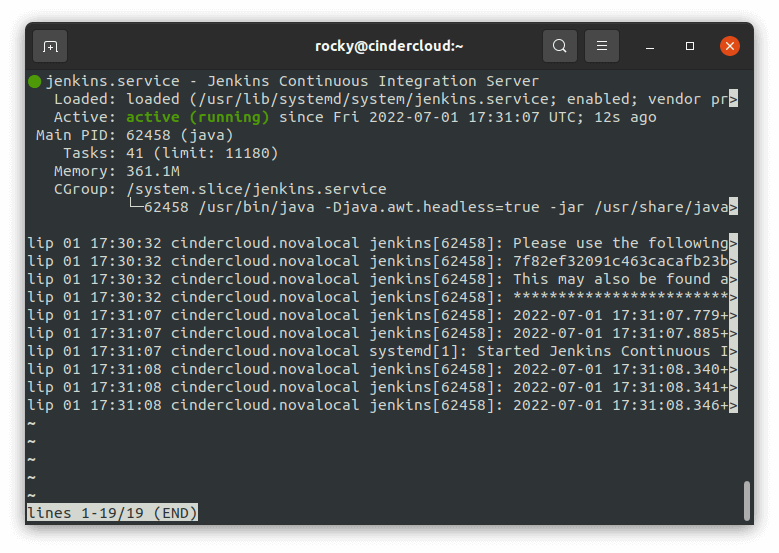
sudo systemctl status jenkinsAfter that, we can check if our service is running properly with the command below.
sudo systemctl status jenkinsThe proper output should look similar to this one.
Step 4: Initial Jenkins configuration
Once we have Jenkins started and running, we need perform few next steps before we can use it for our needs.
The default port used by the Jenkins web application is 8080, so we need to request http://<SERVER_IP_ADDRESS>:8080 in our browser.
We should see the view from screenshot below.
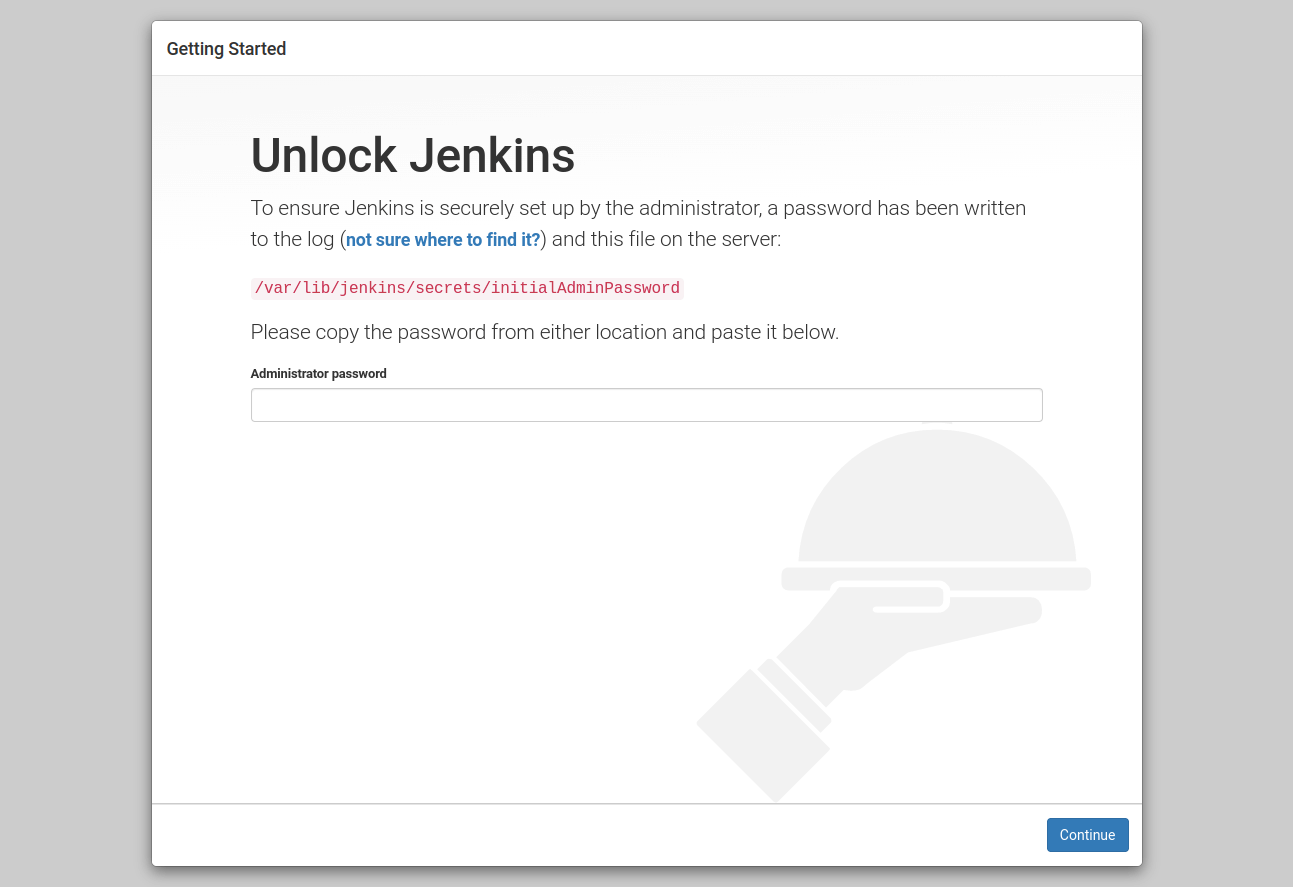
Following the instructions, we need to check the content of initialAdminPassword file and put it in the form from the application.
sudo cat /var/lib/jenkins/secrets/initialAdminPasswordOnce we have pasted initial password in app and clicked the "Continue" button, we are redirected to the next view.
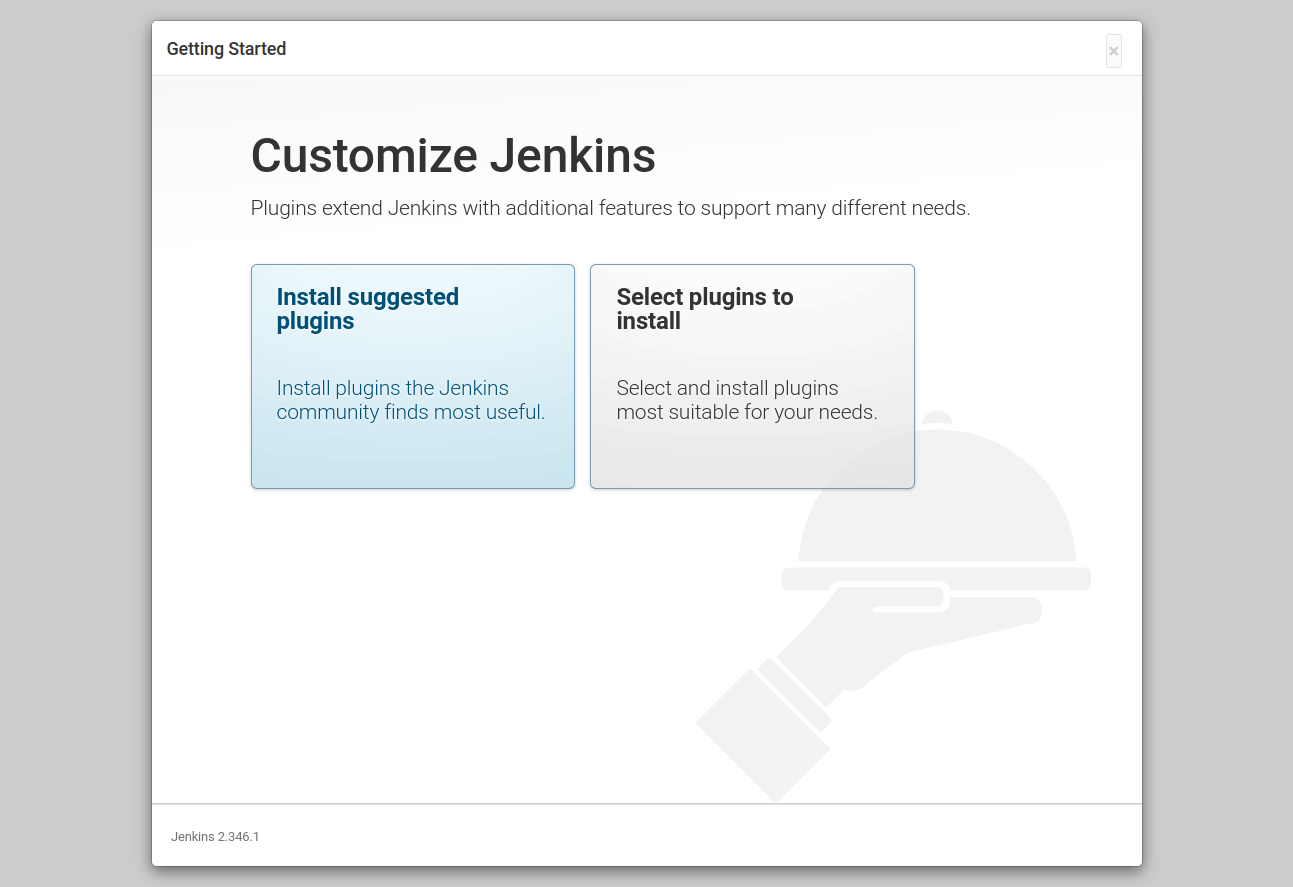
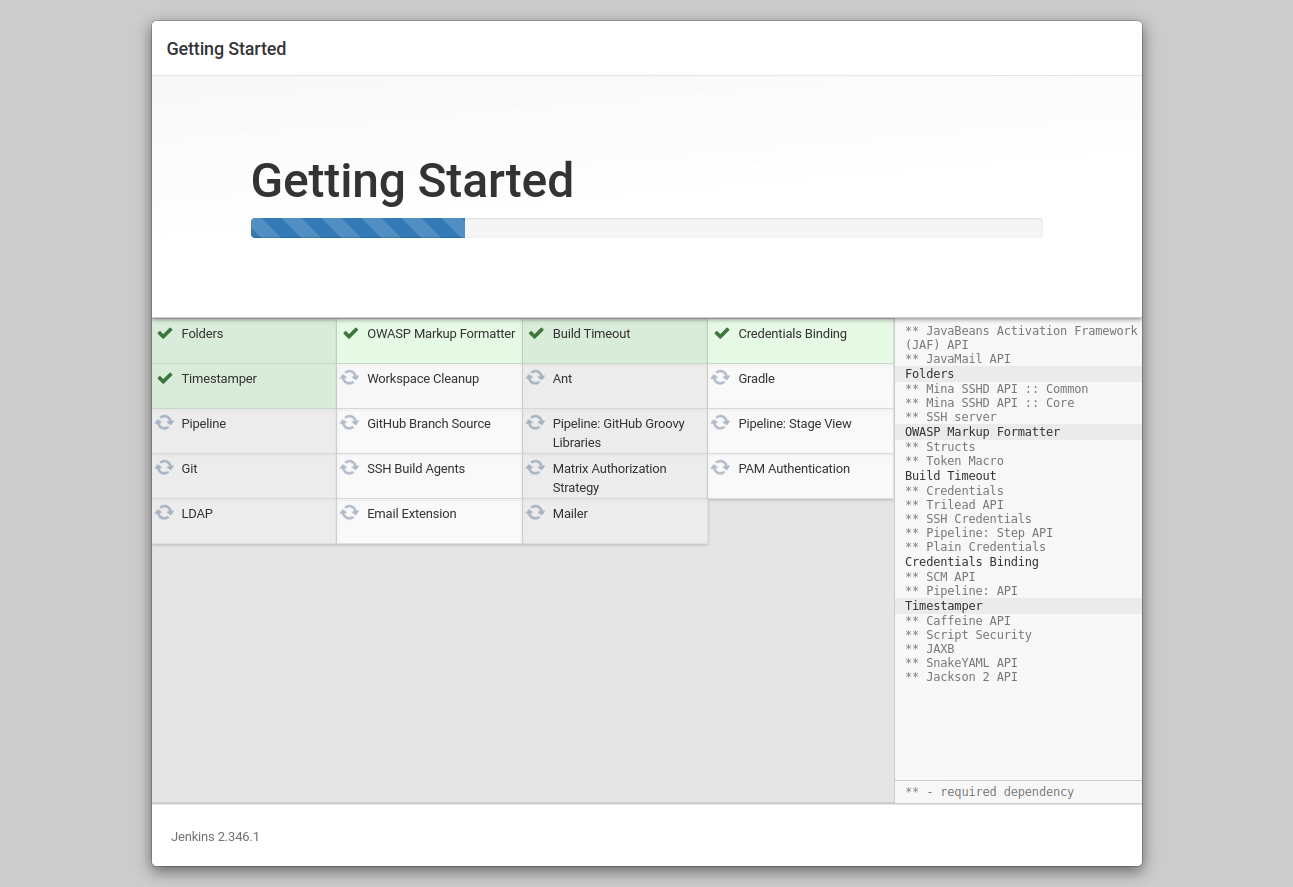
We click the "Install suggested plugins" button, then the installation process will begin.
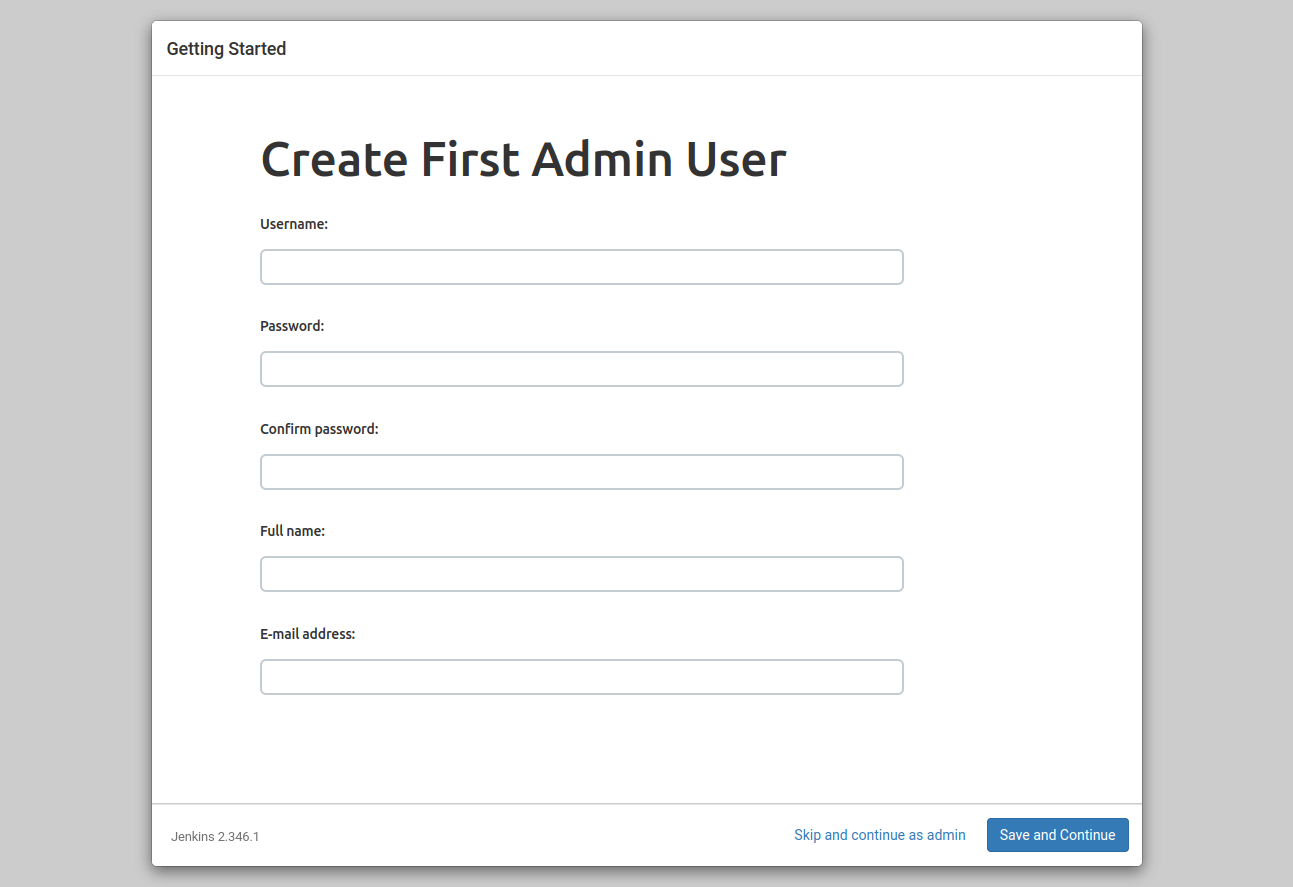
Now, we need to create the initial Jenkins user account. We need to fill out the form.
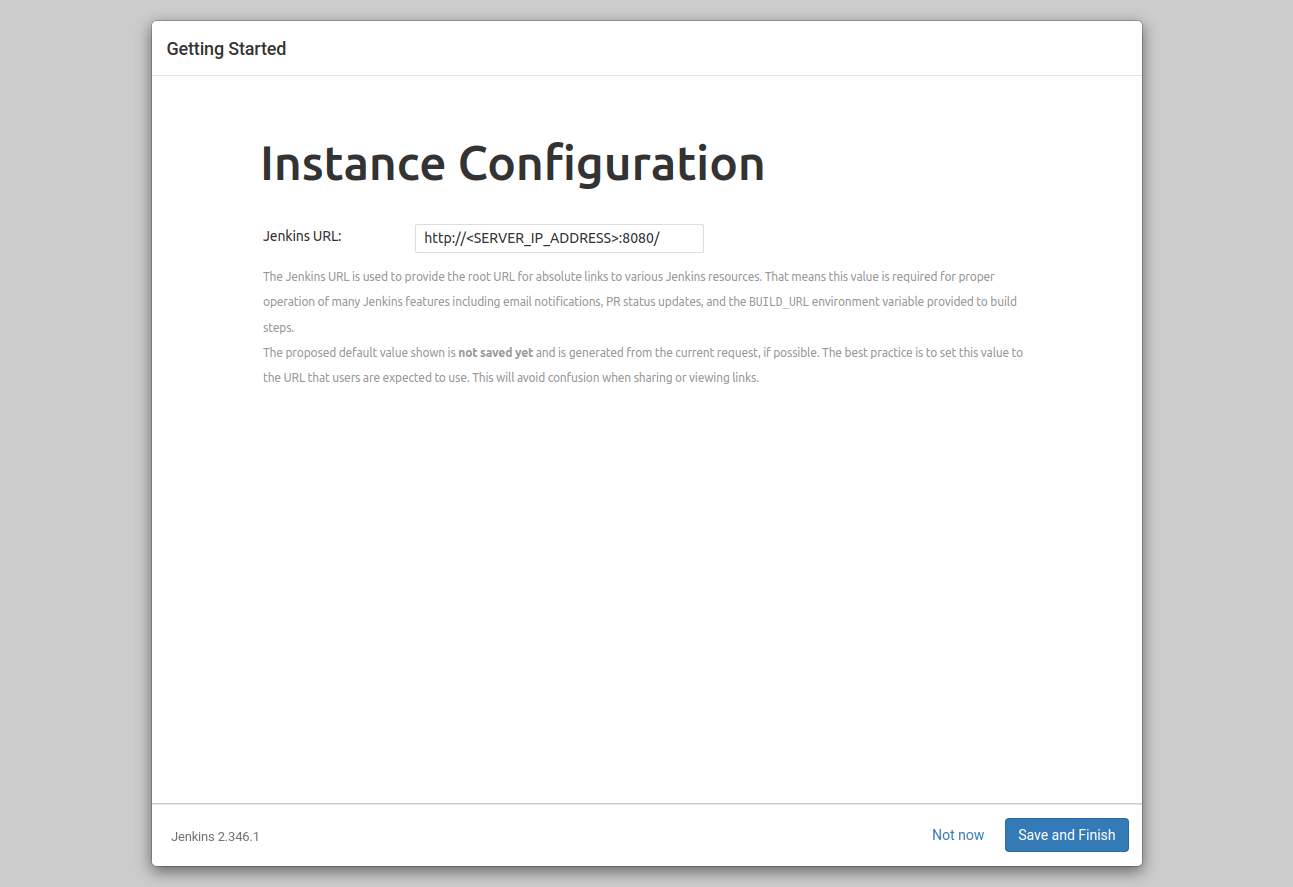
Now we move on to the last stage after installation and configure the address of our instance.
After these steps, we finally have a ready and working Jenkins server prepared.

