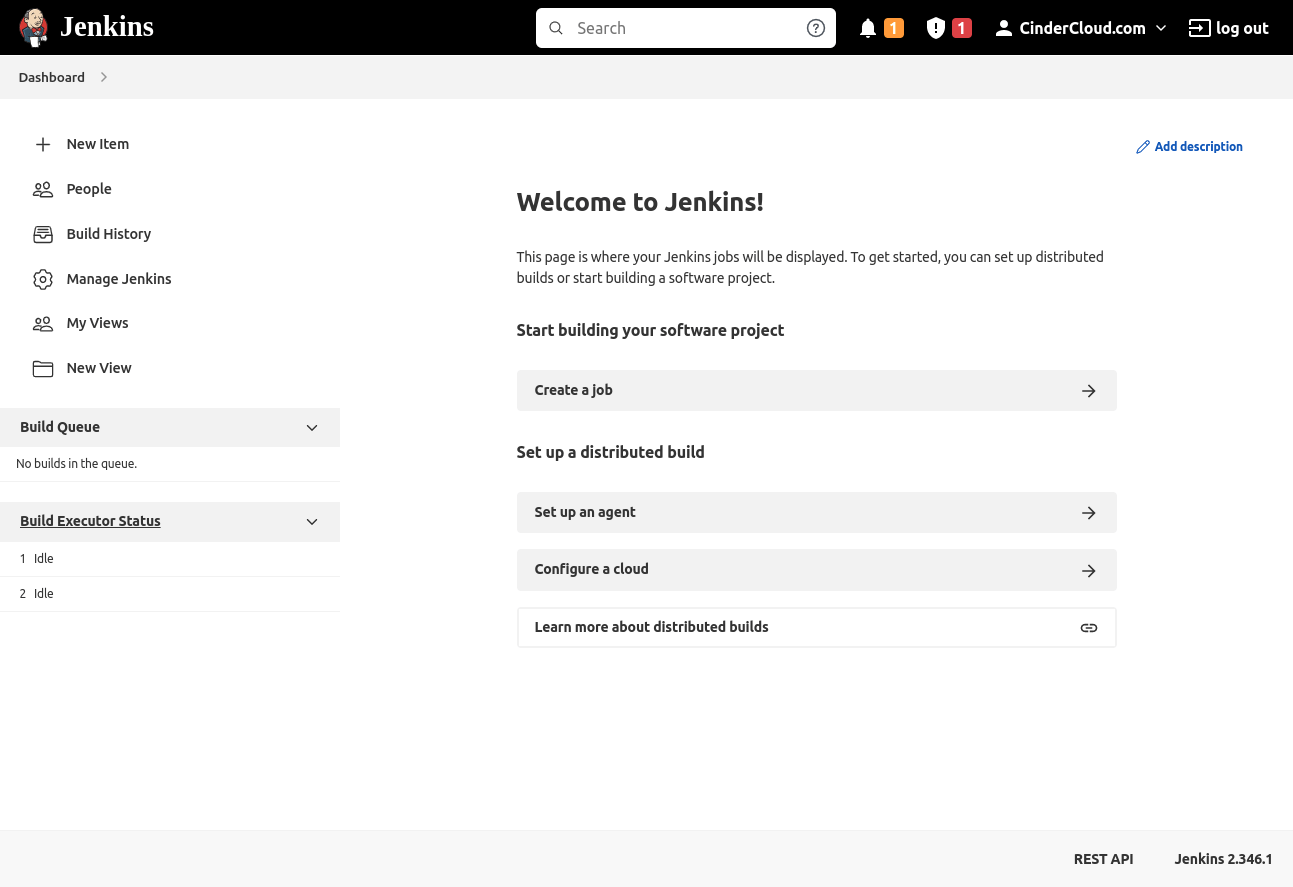
Jenkins to popularny, otwartoźródłowy serwer automatyzacji często wykorzystywany w procesie ciągłej integracji. Jego bogaty ekosystem wtyczek, możliwość rozszerzania i elastyczność oraz wsparcie ze strony społeczności czynią go powszechnie wybieranym narzędziem automatyzacji.
Aplikacja jest oparta na języku Java i działa na wielu platformach Linux i Windows. Może być używana do automatyzacji np. wysyłki e-maili, pobierania treści ze stron internetowych, czy też budowania i testowania oprogramowania. To sprawia, że Jenkins jest niezwykle wszechstronnym i potężnym narzędziem inżyniera oprogramowania.
Ten samouczek pokaże, jak skonfigurować serwer Rocky Linux 8 i zainstalować aplikację webową Jenkins.
Krok 1: Instalacja zależności/wymagań systemowych
Najpierw zaktualizujemy pakiety systemowe.
sudo dnf update -yNastępnie musimy zainstalować zestaw narzędzi do tworzenia aplikacji w języku Java (Java Development Kit, JDK). Zarówno wersje 8, jak i 11 będą działać dla naszych celów. JDK można zainstalować przy użyciu poniższej komendy DNF.
sudo dnf install -y java-1.8.0-openjdkKrok 2: Dodawanie repozytorium Jenkinsa
Aby zainstalować pakiet Jenkins, musimy dodać oficjalne repozytorium do naszego systemu.
sudo dnf install -y wget
sudo wget -O /etc/yum.repos.d/jenkins.repo https://pkg.jenkins.io/redhat-stable/jenkins.repo
sudo rpm --import https://pkg.jenkins.io/redhat-stable/jenkins.io.key
sudo dnf update -y
Krok 3: Instalacja i start aplikacji Jenkinsa
W tym kroku w końcu zainstalujemy pakiet z kontrolerem Jenkinsa (master) i jego aplikacją webową.
sudo dnf install -y jenkinsWtedy startujemy usługę systemd.
sudo systemctl enable jenkins
sudo systemctl start jenkins
sudo systemctl status jenkins
Następnie możemy sprawdzić, czy nasza usługa działa poprawnie za pomocą poniższej komendy.
sudo systemctl status jenkinsJeśli usługa działa poprawnie, powinniśmy zobaczyć, że jej status jest oznaczony jako "active (running)".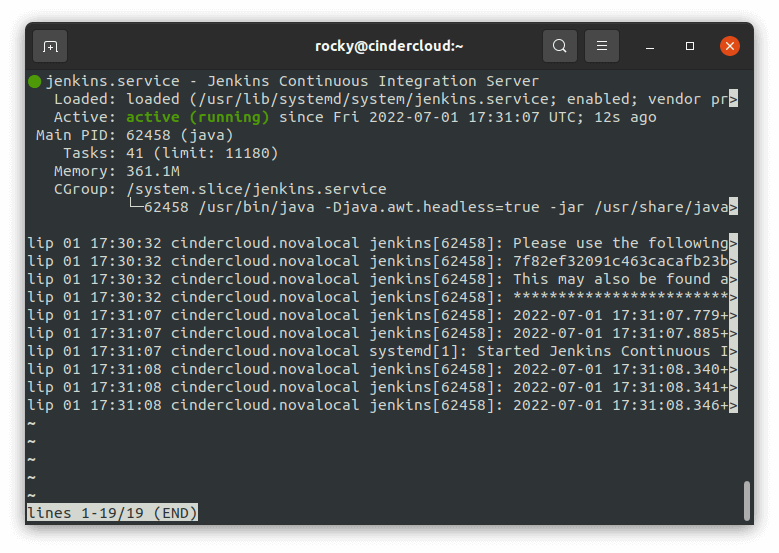
Krok 4: Pierwsza konfiguracja Jenkinsa
Kiedy już uruchomiliśmy Jenkinsa, musimy wykonać kilka kolejnych kroków, zanim będziemy mogli go użyć do naszych potrzeb.
Domyślny port używany przez aplikację webową Jenkinsa to 8080, więc musimy wpisać http://<ADRES_IP>:8080 w naszej przeglądarce.
Powinniśmy ujrzeć widok jak z poniższego zrzutu ekranu.
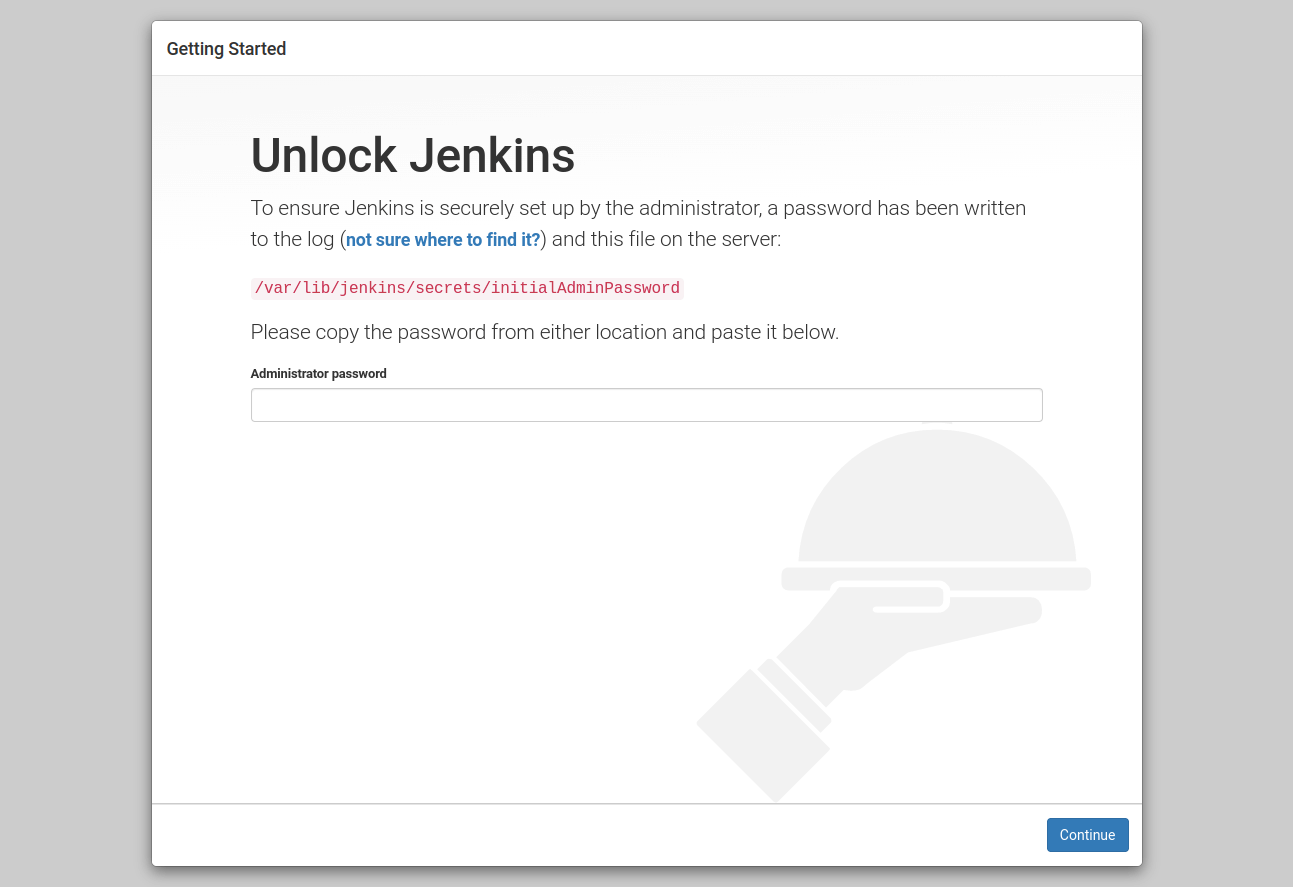
Postępując zgodnie z instrukcjami, musimy sprawdzić zawartość pliku initialAdminPassword i wprowadzić go w formularzu z aplikacji.
sudo cat /var/lib/jenkins/secrets/initialAdminPasswordNastępnie skopiuj wygenerowany ciąg znaków i wprowadź go w formularzu z aplikacji, który pojawił się w przeglądarce.
Kiedy już wkleiliśmy hasło początkowe w aplikacji i kliknęliśmy przycisk "Kontynuuj", zostaniemy przekierowani do kolejnego widoku.
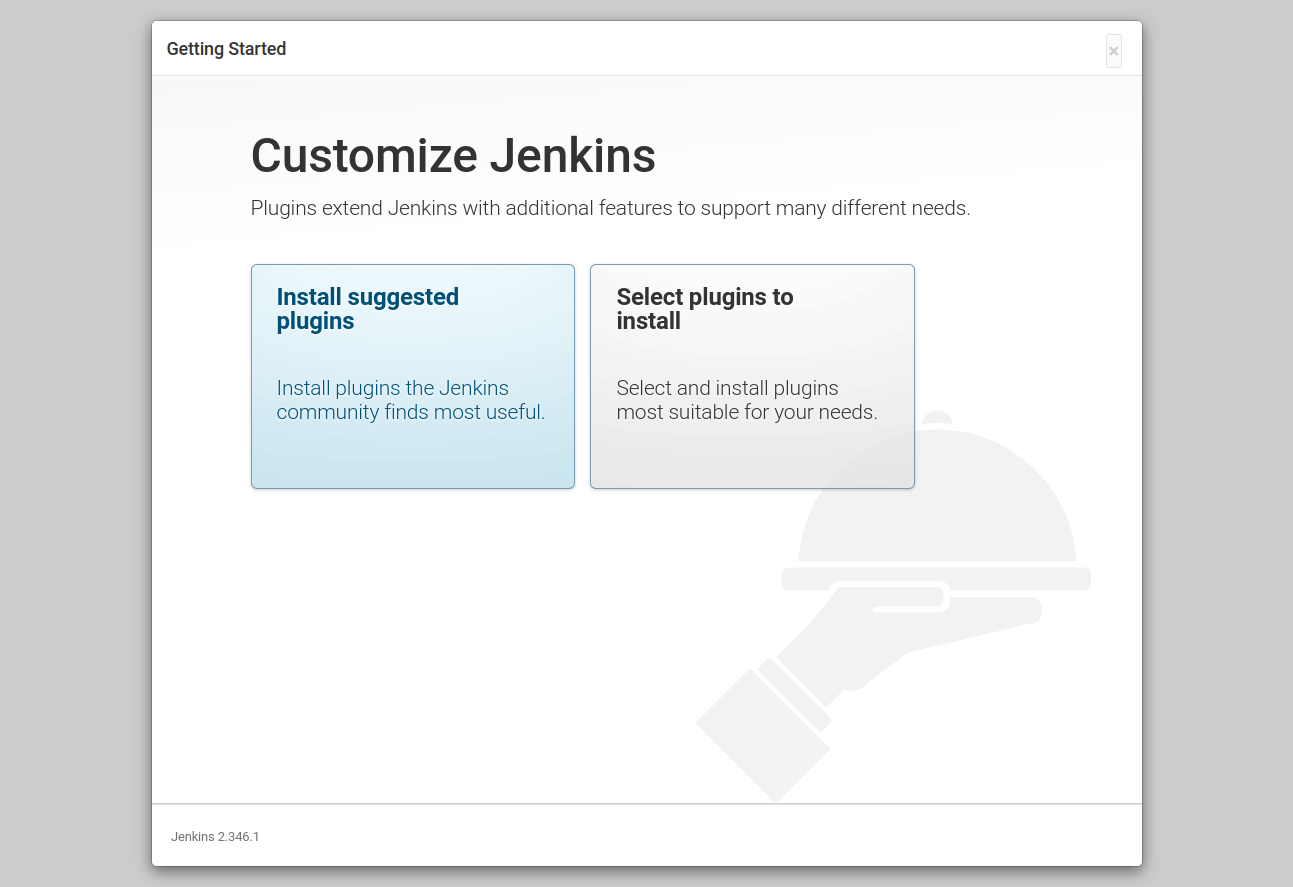
Klikamy przycisk "Install suggested plugins", a następnie zaczyna się proces instalacji.
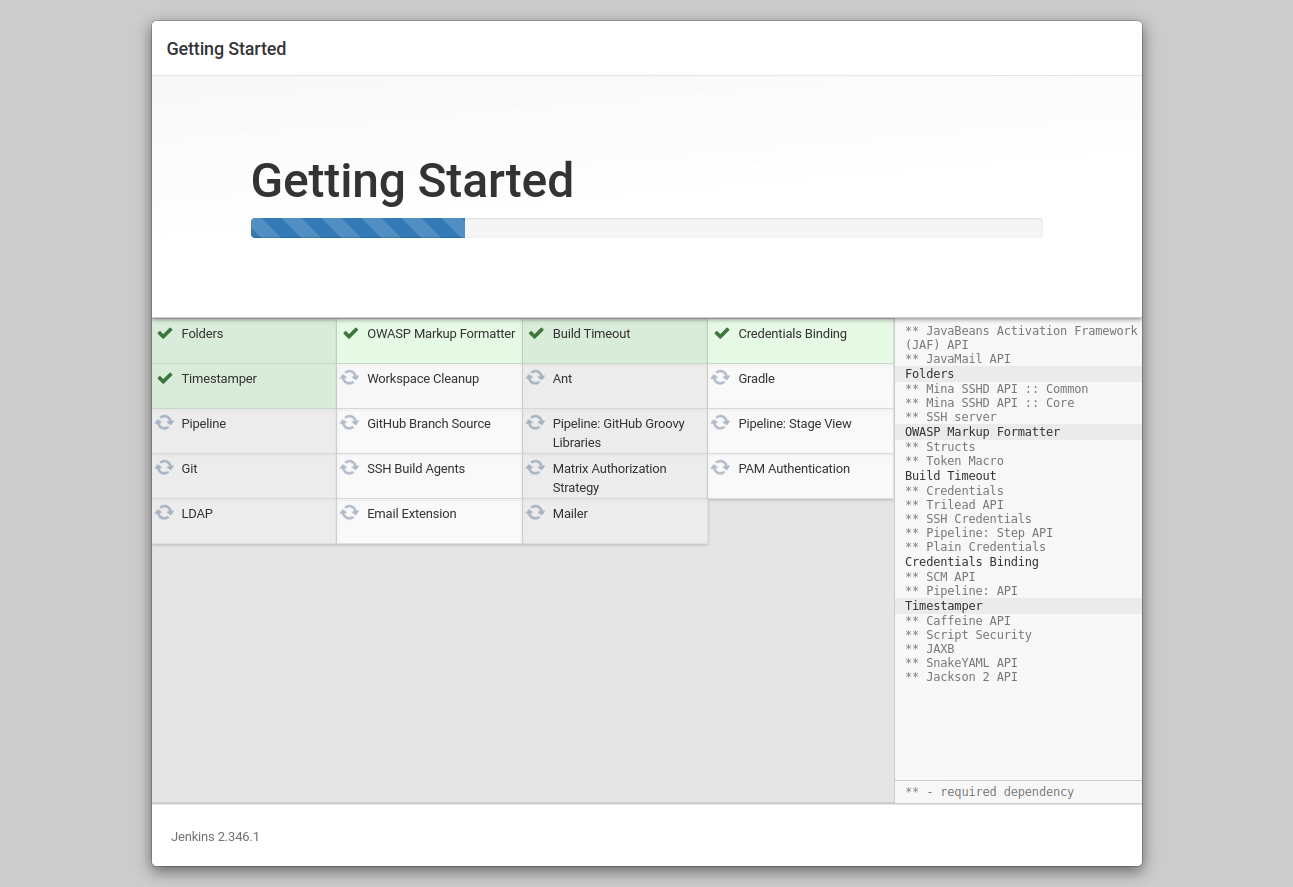
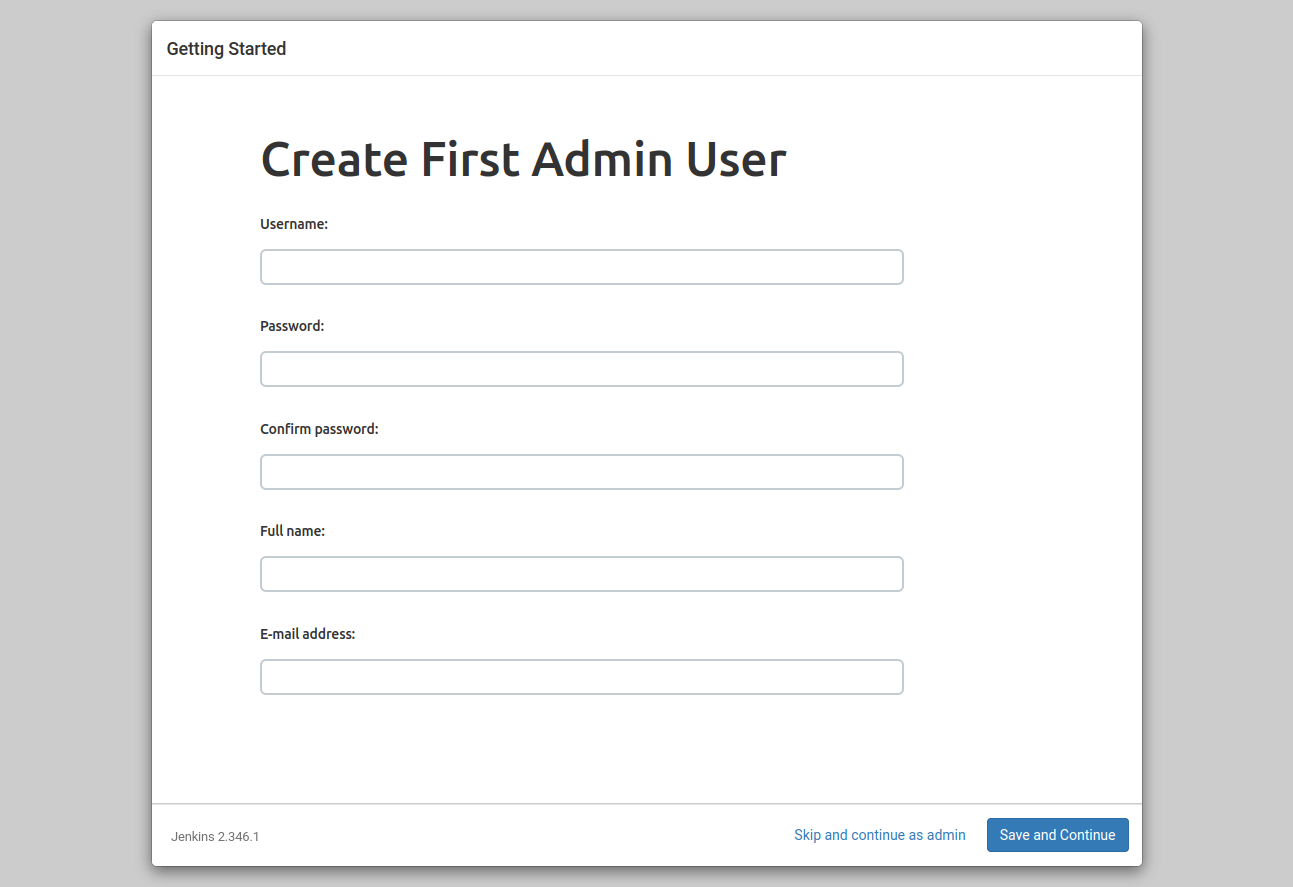
Teraz potrzebujemy stworzyć pierwszego konto użytkownika Jenkinsa. Należy wypełnić formularz.
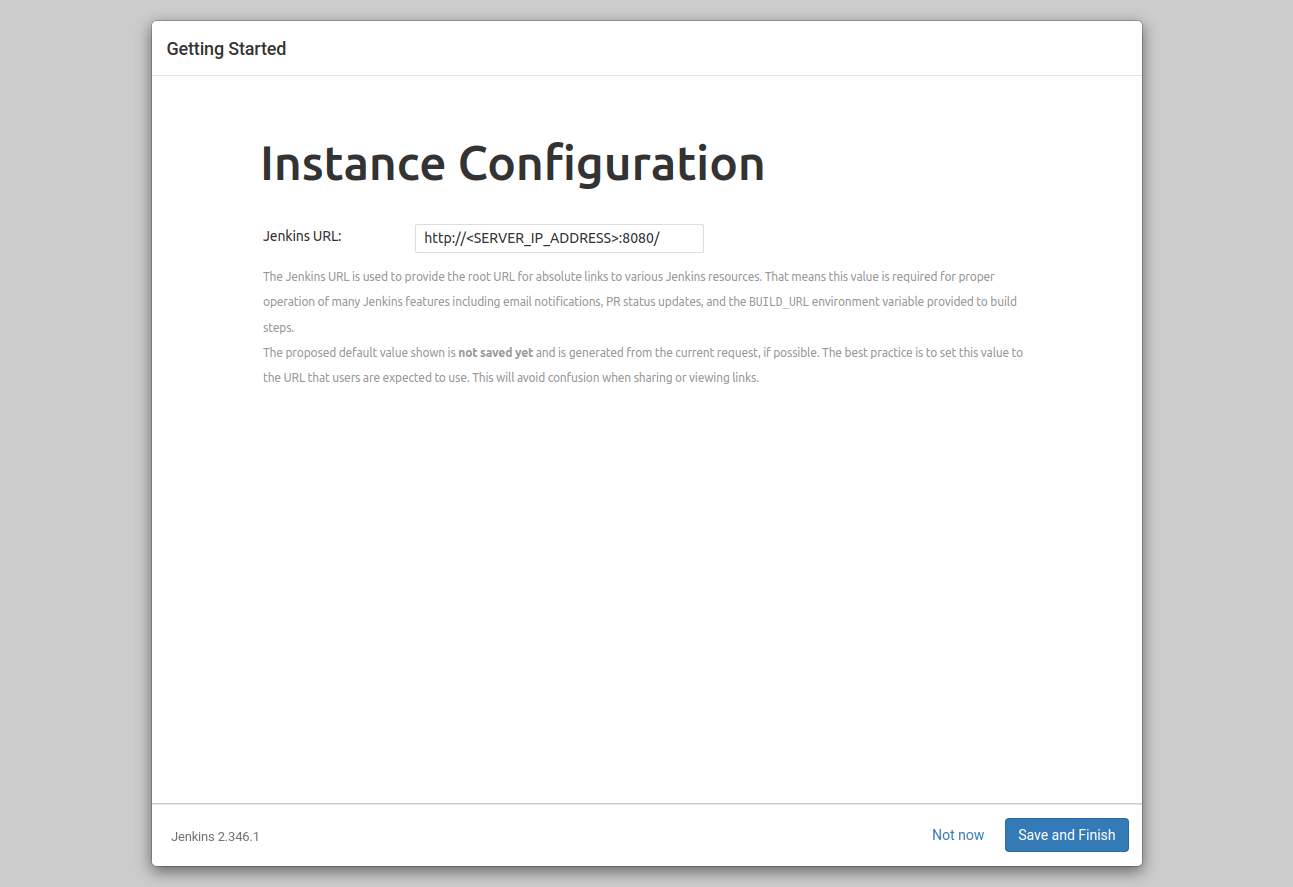
Teraz przechodzimy do ostatniego etapu po instalacji i konfigurujemy adres naszej instancji.
Po wykonaniu wszystkich kroków, nasz Jenkins jest gotowy do działania.
